Tuesday, January 31, 2012

Health Benefits of Strawberries and Strawberry Leaves

Strawberry season has started out here in San Diego and we received our first pint in our organic co-op this week.  Because of the heavy use of pesticides on commercial strawberries, this is definitely a fruit that you want to buy organic.


Strawberries pack a healthy punch!  According to the World's Healthiest Foods, they ranked 27th as a best food in the US, due to their high antioxidant level and ranked 4th among fruits.  They ranked 3rd for the highest antioxidant levels per serving size!

Strawberries are high in Vit. C, phytonutrients, and a good source of manganese.  They are anti-inflammatory in nature, have blood sugar regulating qualities, fight cancer, and benefit the cardiovascular system.  You can read more about them HERE.

Strawberries are a fragile food, so if you cannot consume them within a day or two of picking or buying at the grocery store, then freeze them right away.  You want to look for berries that look plump and are bright red.

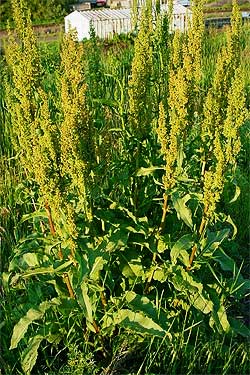
Photo Credit: grit.com


Strawberry leaves are also of value!  These can be taken as a tea or in capsule form (do not take if you have a strawberry allergy).  The leaves can be used to help balance the acids in your digestive tract and are a good digestive tonic.  Strawberry leaves can also help to prevent anemia and help with aches and pains of arthritis.  They are rich in vitamins and minerals, and is one of the best natural sources of vit. C.  The leaves can be made into an infusion tea the same way you would use red raspberry leaves.


Monday, January 30, 2012

Dried Apples


I tried my hand at drying apples for the first time this past weekend.  I bought an Excalibur square dehydrator last year and have mainly used it for drying nuts, making yogurt and drying a big batch of tomatoes last year.  We have had a lot of apples coming through the co-op lately and I was tired of making applesauce, as good as it is!  I'm finding that drying fruits and vegetables, especially "seconds" is going to be a great way to save money and make use of what is in season.  Drying foods is also an excellent way to retain many of their healthy nutrients, which processes like canning destroy.

These are pink lady apples and they came out SO yummy.  I used a mandoline slicer to make my slices nice and even (that slicer was a life saver last year when I dried about 40 pounds of "seconds" tomatoes).  These were quick to make and a great snack to have around the house.

Sunday, January 29, 2012

Cultured (Lacto-fermented) Citrus Marmalade

It's Cultured Monday again!  How is everyone doing with their culturing goals?  I have had so much fun coming up with different cultured recipes and eating them with my family everyday.  I have also noticed that since my two year old has been eating more cultured foods the yeast that he had behind his knees is gone!  I'm very curious to see if this lasts.

Here are a few ways we have used my cultured foods so far this year:

*Cultured Ginger Root:  minced into salad dressing for a delicious kick.  I also used it finely minced on pancakes with other fruit and in our morning smoothies for an immune boosting kick.

*Cultured Mustard:  served on bratwurst.  I also used it in chicken salad and in salad dressing.

*Cultured Applesauce:  served with a little honey or cherry juice concentrate due to it's tangy taste.  My two year old loves this!  I also mix it with other fruits, like my cultured tangerines, minced cultured ginger root, and fresh strawberries and put it on pancakes.

*Sauerkraut:  I serve this as a condiment with almost any meal.  I have some fun recipes coming up in the next few weeks of different sauerkraut and other vegie combos.


I hope that is a helpful list of just some of the ways you can use these cultured foods.  I love to hear any other ideas you have!


Today I am posting my cultured tangerines and oranges.  I followed the recipe from Nourishing Traditions which calls it a marmalade, but it's really too soupy to be a marmalade.  These are SO good and a perfect topper for chicken or fish after you have cooked these meats, put into smoothies, or diced into cooked rice.  They are also good eaten right out of the jar.  We have had such a bounty of citrus - this is the perfect way to preserve them and keep (and even add to) their high nutrient value.

Here is the recipe from Nourishing Traditions:


*3-4 organic oranges
*1 T sea salt
*1/4 cup whey
*1/2 cup filtered water
*1/4 cup Rapadura


Slice oranges very thinly and cut slices into quarters.  Place in a quart-sized wide mouth mason jar and press down lightly with a wooden pounder or a meat hammer.  COmbine remaining ingredients and pour over oranges, adding more water if necessary to cover them.  Marmalade should be at least 1 inch below the top of the jar.  Cover tightly and keep at room temperature for about 3 days before transferring to cold storage.  If marmalade develops spots of while mold on the top, simply remove them with a spoon.


I did not have any problems with mold and added a bit more rapadura than called for.  I also would gently turn the jar a few times a day to make sure the citrus at the top was getting washed in the culturing fluid.  If you like things a bit sweeter, add some extra sucanat once these are done fermenting.


(Featured on Make Ahead Meals for Busy Moms, The Healthy Home Economist, Homestead Revival, DIY Home Sweet Home, So Very Creative, Home Savvy A to Z, Sumo's Sweet Stuff, You are Talking Too Much, Ruth's Real Foods,  My Sweet and Savory, The Gunny Sack, New Life On a Homestead, A Southern Fairytale, Mom's Crazy Cooking, Organizing Junkie, Frugal Antics of a Harried Homemaker, Delightfully Dowling, Marvelously Messy, From Messhall to Bistro, All the Small Stuff, Nap Time Creations, Real Food Forager, Simply Sugar and Gluten Free, Balancing Beauty and Bedlam, Whole New Mom, Far Above Rubies, Hope Studios, Mandie's Recipe Box, Not Just a Housewife, Time Warp Wife, 21st Century Housewife, Learning the Frugal Life, Frugally Sustainable, We Are that Family, Food Corner, Savvy Southern Style, The King's Court IV, Chef in Training, Kelly the Kitchen Kop, This Chick Cooks, Gingersnap Crafts, Beyond the Peel, Raising Homemakers, Delightful Order, Momnivore's Delimma, Miz Helen's Country Kitchen, Gluten Free Pantry, A Little Nosh, Frugal Follies, Somewhat Simple, GNOWFGLINS, Tales From Bloggeritasville, It's a Keeper, A Glimpse Inside, The Nourishing Gourmet, Simply Sweet Home, Happy Hour Projects, Fingerprints on the Fridge, Creation Corner, Comfy in the Kitchen, Real Food Freaks, Common Sense Homesteading, Bacon Time, Allergy Free Vintage Cooking, Fitness Health and Happiness, Real Foods Whole Health, Whipperberry, Food Renegade, Natural Mother's Network)

Thursday, January 26, 2012

My Little Garden

Gardening is not my forte...I seem to kill almost everything I plant, mostly from lack of watering, I think.  But, I was motivated to try again and just finished planting my little garden because...
this time I have a little helper who LOVES to help mommy water the "garden".  I am very happy about this because it's a shame to not garden when we live in a place that we can have a thriving garden year round.
So far, due to his help, my little garden is flourishing!  We have rosemary, red kale, sage, chamomile, lemon balm, nasturtium, red dandelion, apple mint, chocolate mint, onion and basil.  The nasturtium is growing SO fast, I can start adding it to my salads now for a nice peppery kick.  Hooray for my little gardener!

Wednesday, January 25, 2012

Make Your Own Baking Powder

Through some reading I have done, I have read that some brands of baking powder carry aluminum in them.  No thanks!
I was busy looking for a source that was guaranteed aluminum free, when I stumbled across this recipe in Super Natural Cooking by Heidi Swanson.

Super Natural Cooking: Five Delicious Ways to Incorporate Whole and Natural Foods into Your Cooking

I have been using it for months now and love it.  My baked goods rise beautifully and it's easy and inexpensive to make.
Here is her recipe:

*1 part baking soda
*2 parts cream of tartar
*2 parts arrowroot

Simply mix together.  Swanson says this should last for a month, but I have had mine at least 6 months and it still seems to be working great!

(Shared at the Healthy Home Economist, Homestead Revival, Real Food Forager, Kelly the Kitchen Kop, Mind Body and SolePremeditated LeftoversFrugal FolliesDelightful OrderSomewhat SimpleMomnivore's DelimmaMiz Helen's Country CottageA Little NoshGNOWFGINS, The Nourishing Gourmet, Real Food Whole Health, Real Food FreaksJennifer Cooks, Creation Corner, Bacon Time , Jo's Health Corner, FIngerprints on the Fridge, Allergy Free Vintage Cooking, Fitness Friday, Food Renegade, Raising Isabella)

Tuesday, January 24, 2012

Red Raspberry Leaf

Rubus Idaeus (Raspberry Leaves)

Red raspberry leaf has become the herb of choice for pregnant women due to it's ability to tone the uterus, shorten labor, and help prevent cervical tears, but I would also like to list its benefits outside of pregnancy.  We regularly consume this herb in our household as a tea.

Here are just some of the other benefits of red raspberry leaf:

*helps to balance hormones
*rich in minerals such as calcium, iron, manganese, and phosphous
*rich in vitamins A, B, and C
*due to it's astringent (tightening) properties, this herb is excellent for diarrhea, even for children
*good to use when you have a cold or a fever because of it's antiviral and antibacterial properties
*helps with sterility
*bleeding and inflamed gums
*helps to reduce blood sugar

My favorite way to use this herb is to make a tea with the leaves.  Adults and children can take this herb. I like to give it to my son once a week or so due to the vitamin and mineral content.  If you are giving this to a child, be sure that you use the proper formulas, most often by weight, to figure out the safe dose.  Many formulas can be found online and I will also be doing a future post.  My best advice for giving herbs to children is to buy the book Gentle Healing for Baby and Child.  This author reviews how to determine dose and what herbs can be safely given to children.

Winner of our Giveaway!

We picked our winner through random.org and #12 won, Amanda!  Please send me your contact info (you can leave it in a comment that I will not publish) and we will get the book out to you right away.  Thank you to all who stopped by for our giveaway.  We hope to do another one soon!

Monday, January 23, 2012

Soaking and Drying Nuts

Have you ever tasted soaked and then dried nuts?  They are delicious and so much easier to digest than their unsoaked counterparts.  


Nuts contain enzyme inhibitors which affect their ability to be digested.  Raw, soaked nuts are also a source of digestive enzymes.  This is why it is important to soak your nuts before you eat them.

You can eat nuts that have been soaked without drying them if you do not have a food dehydrator, but they will not be crisp.  Nuts that have been dried at 95-100 degrees for 12-24 hours will be crispy and so delicious!

I soak and dry my nuts and seeds in large amounts, then freeze them and they are ready for use in any way that you would use ordinary nuts.

Walnuts soaking


Take 8 cups of your choice of nuts or seeds (do not mix - do a single kind of nut or seed at a time) and place in a large glass bowl.  Add 2 T of sea salt and cover with water, making sure that you have 2-3 inches of water above the nuts as they will absorb quite a bit of water.  Let them sit over night or at least 7 hours.
Walnuts getting ready to dry on my Excalibur dehydrator.

Drain your nuts and place in a single layer on a quality food dehydrator.  Dry at 95-105 degrees for 12-24 hours or until completely dry.  The drying time will determined by the kind of nut or seed and the climate you are in.

Place your nuts or seeds in your freezer to maintain freshness and to prevent them from going rancid.

(I love my Excalibur dehydrator.  I can do huge batches of nuts, fruits, or vegies, and I also like to use it to make yogurt.  I feel it was a great investment, especially since mine has a timer.  I have been using it for a year and love it!)

Sunday, January 22, 2012

Cultured (Lacto-fermented) Mustard

It's Monday again, and here is another cultured recipe!  This is cultured (or lacto-fermented) mustard.  It's so easy to make and SO yummy!  This was a huge hit with the hubby, especially when served on bratwurst.  We will never go back to store bought mustard again, especially since this is so inexpensive to make.

Adding ingredients to make my mustard
 I used this recipe that I found on the GNOWFGLINS website.  The only difference is in red print and it is that I added mustard seeds.


Ingredients:
  • 1/2 cup mustard powder
  • 3 tablespoons whey (OR whey from coconut milk kefir OR 2 tablespoons apple cider vinegar*)
  • 2 tablespoons water (if using acv, use 3 tablespoons water)
  • 3 tablespoons dried dill –OR– 5 tablespoons chopped fresh dill
  • 3 to 5 tablespoons honey
  • 1 teaspoon sea salt
(I added to this 2 Tbsp each of yellow and brown mustard seeds, and I used yogurt whey so this would be a fermented recipe.)

Add ingredients to a bowl. Stir well. Pour mustard into a jar. Cover tightly and leave on the counter for three days before moving it to the refrigerator. Enjoy!
*If using apple cider vinegar, this will not be lacto-fermented. Leave it out at room temperature for a few hours or a day, then move it to the refrigerator.
Completed mustard, ready to sit!
(Featured on The Healthy Home Economist, You are Talking Too Much, 11th Heaven's Homemaking Haven, My Sweet and Savory, So Very Creative, Make Ahead Meals for Busy Moms, Delightfully Dowling, DIY Home Sweet Home, Home Savvy A-Z, Sumo Sweet Stuff, Frugal Antics of a Harried Homemaker, 11th Heaven's Homemaking Haven, Homestead Revival, The Gunny Sack, New Life on a Homestead, Ruth's Real Food, Marvelously Messy, Permanent Posies, All the Small Stuff, Real Food Forager, Simply Sugar and Gluten Free, From Mess Hall to Bistro, Hope Studios, TIme Warp WIfe Far Above Rubies, Whole New Mom, Mandy's Recipe Box, Not Just a Housewife, Rook #17, 21st Century Housewife, Beyond the Peel, We Are That Family, Kelly the Kitchen Kop, Frugally Sustainable, Savvy Southern Style, The King's Court IV, This Chick Cooks, Take it From Me, Ginger Snap Crafts, Wildcrafting Wednesdays, Gluten Free Pantry, Premeditated Leftovers, Frugal Follies, Delightful Order, Somewhat Simple, Momnivore's Delimma, Miz Helen's Country Cottage, A Little Nosh, Tales from Blogerittasville, It's a KeeperA Glimpse Inside, RaeGunWearThe Nourishing Gourmet, Hear the Bells, Happy Hour Projects, Whipperberry,Comfy in the Kitchen, Real Food Whole Health, Real Food Freaks , Jennifer Cooks, Creation Corner, Bacon Time , Jo's Health Corner, FIngerprints on the Fridge, Allergy Free Vintage Cooking, Fitness Friday, Food Renegade, These Peas Taste Funny)

Thursday, January 19, 2012

Safe Cookware

*Don't forget to join us in our giveaway, which ends soon!  Go HERE to enter...*

Such a dilemma, right?  What to use when you cook your food.  I've used a few different pieces of cookware, starting my married life with all clad and now ending up with an assortment of cookware pieces.  I sold my all clad a few years ago and now use vintage cast iron, vintage corning ware glass pots, and Le Creuset dutch ovens.  I converted over to these pieces after reading that scratched stainless steel can be leaching aluminum.  And whose pots stay scratch free?


The cast iron and corning ware I have purchased on ebay and are inexpensive as far as cookware goes.  I always look for vintage, as those do not carry the "seasoning" that comes on the modern pieces, many of which are made in China.  I check with the person that I buy them from to be sure that they did not use chemicals if they have seasoned the pieces themselves.  Wagner ware and Griswold are the two brands that I stick with.


I have a small round griddle and large round griddle, both favorites of mine.  These are great for using to make a quick batch of eggs or pancakes and I use these to warm up leftovers instead of using the microwave.  I also have a large griddle that I use that fits across two burners when I want to make a lot of pancakes or omelets.  I  have a 10 inch chicken fryer that I use for cooking up vegies or making frittatas.  I love the fact that it can go from stove top to oven.  I also have a small 5 inch pan that is great for warming up leftovers or melting butter for popcorn.  =)

I use my glass corning ware pots for cooking pasta, rice, and boiling water for teas.

I have two sizes of Le Creuset dutch ovens.  My 5 1/2 quart oven is used for pastas, risottos, soups and  cooking beans.  My 13 quart oven is used for stocks and cooking whole chickens with vegies.  I love that these can go from stove to oven to fridge.  The 13 quart one is quite expensive, but I found mine at about a third of the normal price on clearance at a Le Creuest outlet shop.

I love my cookware and don't miss the non-stick "stainless" steel that I used to have.  I like being confident that I am cooking on safe surfaces, especially now that I have a toddler.

If readers are interested, I will do a post about how I clean and care for my cast iron.

(Featured on GNOWFGLINS, The Nourishing Gourmet, Real Food Freaks, Real Foods Whole Health, Real Food Renegade, Butter Believer, Natural Mother's Network)

Wednesday, January 18, 2012

Homemade Herbal Shampoo

I have long been looking for an organic shampoo that works well and does not cost an arm and a leg and it has finally come down to me starting to make my own.  I adapted a recipe from herbmentor and so far am liking it.  I suggest you reading the post as they offer different ingredients for different hair types.  My hair tends to be on the oily side and thin, so here is the formulation I came up with for my hair (I used all organic ingredients):

*8 ounce distilled water
*2 tsp nettle
*2 tsp oat straw
*3 ounces castille soap
*3 T aloe vera gel
*1/4 tsp jojoba oil
*15 drops rosemary essential oil
*5 drops sage essential oil
*3 drops tea tree oil
*7 drops lavender essential oil

Bring the distilled water to a boil.  Place the nettle and oat straw in a 16 ounce glass bottle.  Pour the hot water over the herbs and allow to sit for 30 minutes.  In a 16 ounce glass bottle add essential oils.  Roll the bottle in your hands (with cap on) to allow the oils to mix together.  Then add jojoba oil and again roll the bottle for a few seconds.  Strain the nettle and oat straw tea and add to the jar with the essential oils.  Add the castille soap and aloe.  Lightly shake to mix well.  This should last a few months, keep in fridge to extend shelf life.  Use about 2 tsp to 1T worth per shampoo.  Avoid getting in eyes because of essential oils and shake well before each use.

photo credit: www.itsnature.org

I used more rosemary in my essential oil base because it is very beneficial for the scalp and hair.  It helps stimulate hair growth and helps hair to grow stronger and longer.  It also is touted to slow hair loss and pre-mature graying.

If you want to use this shampoo while nursing or pregnant, leave out the essential oils.

Tuesday, January 17, 2012

Yellow Dock - An Iron Rich Tea

As I have been recovering from my miscarriage, I have been looking for natural sources of iron to take to make sure I do not become anemic.  Yellow dock root is an excellent source of iron and can easily be made into a tea.  Because it is a root, it needs to be made as a decoction, which means that it needs to be simmered to extract all it's healing properties.  Please read my post HERE for complete instructions on how to make a simple decoction.  I often combine yellow dock root with burdock and dandelion roots and brew all three together.

Yellow Dock,  Rumex crispus
photo credit: www.middlepath.com


Not only is yellow dock rich in iron but it has other benefits that include:

*cleansing the blood
*cleansing the liver
*cleanses the digestive system
*can act as a mild laxative
*can help to clear acne and eczema
*improves the function of the kidneys and lymph
*rich in vitamins and mineral which include iron, calcium, and magnesium

If you have any medical conditions or are nursing or pregnant, always talk with your practitioner before starting any herbs.  And as with all herbal remedies, I recommend rotating through your herbs.

Monday, January 16, 2012

Giveaway

My sister Christy, over at Whole Foods on a Budget, and I are hosting a giveaway on our blogs over the next week.  We are giving away a book that we both love to use, Better Basics for the Home.


Better Basics for the Home is an outstanding resource full of natural solutions to anything from getting rid of pests to making all sorts of house cleaning products to making your own skin care products. 

The winner will be announced in one week on Jan. 24th.  Please be sure to check back and see if you have won and then provide us with your contact information.

You will have 4 chances to enter. For each entry, you must leave a comment.  The giveaway is open now until midnight on Jan 22.

*Subscribe to this blog.
*Subscribe to Whole Foods On a Budget.
*Post a favorite blog entry from this blog on facebook.
*Post a favorite entry from Whole Foods On a Budget on facebook.

Leave all comments on this blog and at the end of the week, we will pick the winner.

Better Basics for the Home: Simple Solutions for Less Toxic Living
            

Sunday, January 15, 2012

Cultured Foods Monday: Cultured Ginger Root


Be sure to stop by our giveaway post starting 1/17 as my sister Christy over at Whole Foods On a Budget and I will be doing a fun giveaway!


It's been so fun seeing how many others in the blog world are all about cultured foods this year!  I have already found so many fun ideas to try.  As I posted last Monday, I will be doing a post every Monday this year with a new cultured foods recipe or with some great cultured food facts.  Today I am posting my cultured ginger root recipe that I adapted from Nourishing Traditions.  Nourishing Traditions calls for 3 pounds of ginger root.  In my opinion, this is way too much to do at one time.  Peeling and slicing up one pound was quite enough for me and this cultured ginger is potent, so a little goes a long way.  Here is my adapted recipe:

*1 pound ginger root, peeled and sliced very thinly
*2 T whey
*1 T pink salt
*1/2-1 cup water

Rinse the peeled and sliced root and place in 3 cup sized jar.  Pound lightly to release juices.  Mix water with the salt and whey and add to ginger.  Make sure that the root is completely covered and that there is at least one inch of space below the top of the jar.  Cover tightly and allow to sit in a dark place at room temperature for 3 days, then transfer to the refrigerator.

Cultured ginger root can be used in a number of recipes.  Try it minced finely in salad dressings, stir fries, yogurt and fruit, fruit crisps, hot tea, steamed rice and more!  If you are adding it to a cooked item, add it after the item has finished cooking to keep the probiotic properties intact.  I added it to salad dressing and it was so yummy!  And, remember, a little bit goes a LONG way!  So make sure you mince it finely and use a small amount.

Be sure to stop by our giveaway post starting 1/17 as my sister Christy over at Whole Foods On a Budget and I will be doing a fun giveaway!

(Featured on Nourishing Treasures, Home Savvy A to Z, My Sweet and Savory, Make Ahead Meals for Busy Moms, Delightfully Dowling, You are Talking Too Much, The Healthy Home Economist, DIY Home Sweet Home, So Very Creative, Marvelously Messy, The Gunny Sack, New Life on a Homestead , Ruth's Real Food , Sumo's Sweet Stuff, Mom's Crazy Cooking , Homestead Revival, Frugal Antics of a Harried Homemaker , 11th Heaven's Homemaking Haven, Organized Junkie, Marvelously Messy, Far Above Rubies, Hope Studious, From Mess Hall to Bistro , Permanent Posies, All the Small Stuff, Nap Time Creations, Real Food Forager, Time Warp Wife, Simply Sugar and Gluten Free, Mandy's Recipe Box, Rook #17, The 21st Century Housewife, Food Corner, Savvy Southern Style, The King's Court IV , Beyond the Peel, We are that Family, Raising Homemakers, Mind Body and Sole, This Chick Cooks, Kelly the Kitchen Kop, Momnivore's Delimma, Somewhat Simple, Miz Helen's Country Cottage, Tales From Bloggeritaville, A Little Nosh , Premeditated Leftovers, Frugal Follies, Delightful Order,  It's a Keeper , The Nourishing Gourmet, Happy Hour Projects , Comfy in the Kitchen, Real Food Whole Health, Real Food Freaks , Food Renegade, Simply Sweet Home, Happy Hour Projects, Bacon Time with the Hungry Hypo , Common Sense Homesteading, Allergy Free Vintage Cooking, Fitness Friday, Whipperberry, Butter Believer, A Well Seasoned Life, Six Sister's Stuff

Friday, January 13, 2012

Lavender Essential Oil

If I could only buy one essential oil, it would be lavender.  Lavender has such a lovely smell, is relatively inexpensive, and has a huge variety of healing powers.  


                                                           (photo credit: theflowerexpert.com)


Some of the healing properties include:


*tonic to the nervous system, including treating anxiety, depression, nervous tension, and emotional distress
*treats headaches and migraines
*helps induce sleep
*helps with sore muscles, sprains, backache, and joint pain
*helps with hormone balance
*helps relieve PMS
*helps to treat urinary tract inflammation
*helpful remedies for colds, flu, and coughs
*helps to treat asthma and bronchitis
*can help to kill lice and nits
*helps promote circulation
*great for treating a number of digestive issues
(You can read more here for further helpful details.)

Do you see why I love it so much?  For detailed information on how you can use this oil on children, I recommend buying the book from amazon, Aromatherapy for the Healthy Child (it is on my recommended book list).  This book includes a variety of ways to use lavender and many other essential oils on your child.

One of my favorite ways of using lavender right now is putting a drop on a cotton ball and placing the cotton ball near my pillow (away from my eyes) and enjoying the beautiful aroma while I sleep.

I also enjoy putting 2-3 drops on a cotton ball and placing in a closet - you can refresh as needed every few days.

(photo credit: whatscookingamerica.net)


Thursday, January 12, 2012

Foods high in Omega 3 Fatty Acids

A healthy balance of omega 3 and omega 6 fatty acids will help create an anti-inflammatory response in your body and will help protect against diseases such as cancer, Alzheimer's, diabetes, arthritis and more.  Sadly the typical American diet has an extremely unhealthy ratio of omega 3 and 6 fatty acids.  There is an excellent article HERE that discusses this imbalance and has a lot of helpful information about balancing your intake.

Vegetable oils such as canola, sunflower, safflower, and corn are full of omega 6 fatty acids.  Try switching to olive oil and coconut oils for daily use.  Avoid processed and packaged foods, as they too, often carry high levels of omega  6 fatty acids.


Include more of these foods in your diet: flaxseed (make sure you crush them in a mortar & pestle or grind them in a coffee bean grinder before consuming), walnuts, wild caught salmon, winter squash, beans, halibut, and tofu.

Make sure that the beef, lamb, and bison you eat has been grassfed (not just grass finished).  Animals that are fed grain end up with meat that contains more omega 6 oils because grains are high in omega 6 fatty acids.  Grass is high in omega 3 oils; thus animals grass fed AND finished end up with meat rich in omega 3 fatty acids.


Finding a high quality EFA oil or fish oil supplement is helpful in adding the omega 3 fatty acids to your diet.  Avoid high consumption of fish due to the levels of mercury, lead, and PCB's they contain.

Wednesday, January 11, 2012

Benefits of Nettle Tea

Nettle tea is one of the standard teas that we consume in our home.  It is an extremely nourishing tea that can be consumed by adults and children alike.


  (photo credit: www.purplesage.org.uk)


Some of the benefits of nettle tea includes:

*rich in minerals, including calcium, magnesium, and zinc
*rich in iron and vitamin C which helps the body to absorb iron
*gently cleanses the body from metabolic wastes
*gentle, stimulating effect on the kidneys
*can be drunk during labor to help ease labor pains
*acts as an antihistamine
*acts as a diuretic
*helpful in eliminating eczema with it's gentle cleansing actions

An infusion (see directions here), can easily be made with dried nettle leaves.  I often combine this with red raspberry leaf, lemon balm, or peppermint.

Monday, January 9, 2012

Lifefactory Glass Bottles, Sippys, and Adult-on-the-Go

I've been through a number safe drinking container options, both for me and my husband and for our little boy.  I have finally found the option that I think is the safest and fits the best for my family.  It is the Lifefactory drinking options, which are all glass.
9 oz Glass Baby Bottles


                                                              (photo credit: Lifefactory)


Lifefactory has glass baby bottle, sippy cups, and adult drinking bottles (and have just come out with an adult flip-cap version).  Some of you may be thinking...glass - with a TODDLER?  I was just as skeptical and had a few other glass bottles break from other companies, but I have been using the Lifefactory glass bottles and now the sippy cups for over a year with no breakage.  And we have wood and ceramic tile floors through out home to boot!  The silicon sleeve is excellent and has been the best protective barrier I have seen.

I am happy that they have come out with the flip top for adults and plan to try a few of these, as I only have their screw tops.  All these bottles are easy to clean and dishwasher safe, including the sleeve.  I have been much happier with these than the stainless steel I was previously using (it seems like the lining of the inside of some of the bottles was breaking down).  These bottles can be bought on amazon for a few dollars less than buying them on the Lifefactory website.


                                                              (photo credit: amazon)
     Lifefactory 22-Ounce Beverage Bottle