Showing posts with label Cultured Foods. Show all posts

Sunday, August 26, 2012

Cultured Mondays - Green Bean "Pickles"

We have been swimming in green beans the past few weeks.  I wanted to make something a little different than just plain salt brine with these, so I added pickling spices and boy, these came out good!

Green Bean Pickles

*5 L Pickl-it
*4-5 pounds green beans
*2-3 fresh stems dill
*1 T yellow mustard seed
*1 T brown mustard seed
*1 T coriander seed
*1 T peppercorns
*1 tsp cardamom pods
*10 cloves
*3 cinnamon sticks
*4-6 dried bay leaves
(If you do not have these individual spices, you can use 4 T pickling spices.)
2% brine (19g salt to 4 cups water)


Wash off the green beans and remove the stem end.  Pack densely into the pickl-it.  Add spices, and lastly the brine.  Place airlock and leave in a dark, cool place for about 3 days, or until bubbling stops.  The ideal fermenting temperature is around 70 degrees, so in warmer weather, they may be done sooner and if it is cool, then leave out for an extra day.

Enjoy!  These are great for dipping, chopped on salads, or just plain!

Sunday, August 5, 2012

Cultured Mondays - Cultured Watermelon Rind

I found this recipe for cultured watermelon rind from my fellow Nourished Living Network blogger, Melanie, at PickleMeToo.  Since we love watermelon so much in this house, I just had to give this one a try.  I followed her recipe, except that I had enough rind to fill a 5 liter Pickl-it and I added about 1 inch of fresh ginger root, a couple of cinnamon sticks and 10-15 cloves.


This came out so yummy and my toddler and husband both liked them.  These are not sweet, but have a salty, spicy tang to them.  Nice and refreshing snack on a hot day.  The brine is delicious and healthy to drink.  If you are new to fermenting in a Pickl-it or new to fermenting in general, I would recommend starting slowly with how much brine you drink.  A 1/4 cup serving for the day would be a good place to start and give your gut some time to get used to the new good bacteria you are introducing to it.

This is a great way to get some bang for your buck from your watermelons!  I do highly recommend that you use organic watermelons.

(Featured on The Healthy Home Economist, Homestead Revival, Real Food Freaks, GNOWFGLINS, The Nourishing Gourmet)

Wednesday, July 18, 2012

The Switch: From Mason Jar to Pickl-it

As many of your know, I have recently made the switch from using mason jars (a method often used by Nourishing Traditions and Sandor Katz) to using a Pickl-it Jar for my culturing and ferments.  I could not be happier with the switch and having been producing some beautiful ferments with less salt and no starter culture or whey.

I made this switch because of new research done by KerryAnn at Cooking Traditional Foods.  I have also appreciated all the information at the Pickl-it Website, which helped me make this decision.

Bottom line - from all the reading I have done, I believe that safer, tastier, and healthier (increased amounts of important probiotics called LABS) ferments are done in an anaerobic environment, which the pickl-it produces and a mason jar cannot.

I really enjoyed reading this article by Kathleen over at Pickl-it today: Open Crocks are a Crock!

If you would like a fun, easy recipe to try with some summer squash, check out my Yellow Squash Pickles...I opened these today and they won't last long.  My toddler is gobbling them down!!


Sunday, July 1, 2012

Cultured Mondays - Grapefruit "Soda"

We have been enjoying a lot of citrus sodas in this house lately with an abundance of citrus coming through our co-op.  I never though I would try this recipe with just grapefruits, but we had a bunch last week so I thought I would give it a try.  It came out tasting quite yummy!


I like my "sodas" on the more sour side, but if you want this sweeter, then add more sucanat or some honey to taste to your finished product.

*2 1/2 cups fresh squeezed grapefruit juice
*1 1/2 cups sucant
*3/4 gallon of water
*1/2 cup cultured "orange" soda as a starter
*1 five liter pickl-it jar

Place all ingredients in your pickl-it jar and stir until well mixed.  Allow to sit in a dark place (like a kitchen cabinet) for 24-36 hours.  These sodas culture fast!  Your finished product should be less sweet than normal grapefruit juice (thus the added sucanat if you need it) and should have a nice fizz to it like soda.  You should be able to see the juice swirling around and bubbles coming out of the airlock.  Transfer to the fridge when it is done culturing.  Like other cultured drinks, start out drinking this slowly, in small amounts with food.  It may take a little time for your body to get used to these new probiotics.


(Featured on Healthy Home Economist, The Homestead Revival, Nourishing Treasures)

Tuesday, June 26, 2012

Orange-aid in the Pickl-it Part 2


This orange-aid came out delicious and took just 36 hours to brew.  I now have it in the fridge to enjoy over the next week.  I do recommend taking it in small doses with food to start with if your body is not familiar with this form of probiotic.

But this is a great way to enjoy orange "soda" naturally!  It does get tart over time, so you can always add 1/2-1 cup of sucanat to the jar for a sweeter soda.  

See the full recipe HERE.

Monday, June 25, 2012

Cultured Monday! Orange-ade in the Pickl-it!

We have had an over abundance of oranges the past few weeks, so I decided to mix up another batch of cultured orange-aide, but this time in my pickl-it jar.  I'm so curious to see how this comes out and will be sure to post up dates!

When using the pickl-it jars, you do not have to use whey as a starter.  Most ferments are just the item to be fermented and a salt brine.  This is because the pickl-it has a special air-lock to help keep the ferment anaerobic.

I was not sure about not putting any starter in my orange-aid, so I use about 1/4 cup of the liquid from my cultured white peaches.  I'm sure that will get things culturing just great!

My cultured orange-aide:

*2 1/2 cups fresh squeezed orange juice
*1 cup sucant
*1/3 cup starter from cultured white peach
*1 gallon of water

Place all in a 5L pickl-it jar.  Allow to sit for 1-3 days.  The longer it sits, the tarter and stronger it will get.

Mine must have risen a lot during the night!  It is bubbling away this morning.  This is after about 18 hours of fermentation time.


Sunday, June 17, 2012

Cultured Mondays - Cucumber Pickles with Garlic

It's Cultured Mondays again!  What do you have fermenting in your home today?  I love using all my fermented items as condiments and snacks throughout the day.  Right now we are enjoying my cultured carrots, zucchini and radish pickles, green beans, and white peaches.

Today I have my cucumber pickles culturing.  I loosely followed Wardeh Hammond's recipe in The Complete Idiot's Guide to Fermenting Foods.  I did not follow the exact measurements, but just used what I had on hand.


I added a bunch of pickling cucumbers (and 2 large cucumbers cut into chunks), 1 head of garlic (cloves smashed a little), 1/2 tsp of black tea leaves, 1 large bunch of dill, and a 3.5% salt brine to my new 5L pickl-it jar.  I'm going to let these brew 3-7 days and see how I like them!  As you can see, even with the glass weights, I still have a few floaters, but I'm not too worried since they are in a pickl-it jar.

(Featured on Healthy Home Economist, The Homestead Revival)

Sunday, June 10, 2012

Cultured Mondays - Cultured White Peaches


*Update*  These cultured quite quickly for me and I put them in the fridge after just two days.  They were fizzing away like crazy - looked like soda in a bottle!  Thankfully, I had them in my pickl-it so there was no explosion.  They taste great - they lost a lot of sweetness, but have a nice white peach flavor.  My toddler is a big fan!  This is a great way to get fruit in your kids without all the sugar.  While it's not as sweet, it's fun for kids to eat because of the fizz.


I love this time of year!  There is SO much delicious fruit in season and I enjoy experimenting, coming up with creative ways to eat all the different kinds of fruit from the farmer's market.

White peaches are some of my absolute favorites, so I am curious to see how they culture.  I just used cinnamon sticks to lightly flavor this ferment, as the white peach flavor is so delicate that I did not want to overpower the peaches with spices.

This recipe is very simple and easy to make.

*4 white peaches
*4 cinnamon sticks
*1/4 cup whey
*2% saline solution (10g of salt to 2 cups water)

Combine all ingredients and place in 1 liter pickl-it jar, leaving at least 1 inch headspace.  Allow to sit for 3-5 days in a dark place.  I use my kitchen cabinet.  The ideal fermenting temp is 70 degrees, so if it is cooler, it will take longer, if warmer, a shorter period of time.

If you are not using a pickl-it jar, then you may need to increase the whey and make a stronger salt solution.  I highly recommend buying a pickl-it jar(s) for fruit ferments, as you can use a lower saline solution, which is nice for fruits, especially ones like peaches.  The pickl-it allows anaerobic fermenting, which means less bacteria for the probiotics to compete with, thus the lower saline solution.

I'm still a bit new to pickl-it, but so far, love their jars!  I just bought 2 of their 5 liter sized jars and look forward to whipping up some large batches of pickles and sauerkraut in the upcoming weeks.

Featured on Natural Mother's Network, Healthy Home Economist)

Sunday, June 3, 2012

Cultured Mondays: Cultured Galicky Zucchini and Radish Rounds

I had some extra garlic, zucchini, and radishes from my co-op, so I decided to combine them and make some zucchini and radish pickles yesterday.  I can't wait to try these out.  My carrots last week came out nicely.  A mild fizz and nice and soft.  My toddler is a big fan!


My radishes were very large and my zucchinis a bit small, so they made a beautiful combination when sliced together - I used the slicer blade on my cuisinart which made the slicing quick and easy.  My garlic cloves were small and skinny, so I just left them whole.


OK - so here's the recipe.  This made enough to fit in my 1 1/2 liter pickl-it jar.

*5 small zucchinis
*12 large radishes
*1 head of garlic
*2 1/2 % saline solution (19 grams of salt to 4 cups of water)
*1/4 cup whey

Wash your zucchinis and radishes off well, trimming the ends.  Peel the garlic cloves and wash the cloves.  They can be slightly crushed if you want a more garlicky brine.  Slice the radishes and zucchini and add to the pickl-it jar along with the garlic.  Pour in your 1/4 cup whey.  Mix your saline solution, then add enough to cover the veggies and leave 1 inch of head space.  Set in a dark place (I use my kitchen cabinet) to culture for 3-5 days.  The ideal fermenting temp is 70 degrees, so if it's cooler, it will take longer and if it's really warm, it will go faster.  If it's already really hot where you are, try to find a cool spot in your house that is dark, I sometimes use our pantry floor, which stays nice and cool with our ceramic tile.  Culturing is an art - you will soon develop your own techniques that come with practice.


(Featured on the Healthy Home Economist, The Homestead Revival, Cooking Traditional Foods, Mind Body and Sole, GNOWFLGINS, The Nourishing Gourmet)

Sunday, May 27, 2012

Spiced Cultured Carrots Using the Pickl-it

It's Cultured Mondays and this week I am happy to feature my first attempt at fermenting using my pickl-it jars.  (I apologize for any blurriness to the pictures as we are having lens issues with my camera.)


I found these jars fairly easy to use and have ordered a few more sizes to try (I have 2 of the 1 1/2 liter size).  I am looking forward to sampling the results in a few days.


My recipe is very easy and quick to make.  This is enough for the two 1 1/2 liter pickl- it jars.

*Approximately 5 pounds of carrots, peeled, washed, and grated
*2% saline solution (4 cups of  filtered water and 19g of pink salt)
*4 cinnamon sticks
*20 cardamon pods
*1/2 cup whey

Press the carrots firmly into your jar.  Pour in your saline solution until it reaches the top of the carrots.  Add your whey, cinnamon sticks, and cardamon pods.  Assemble the jars and airlocks as instructed on the pickl-it website.  Place in a cool, dark place for 3-4 days.  Enjoy!


(Featured on the Healthy Home Economist, Real Food Forager, Cooking Traditional Foods)

Sunday, May 20, 2012

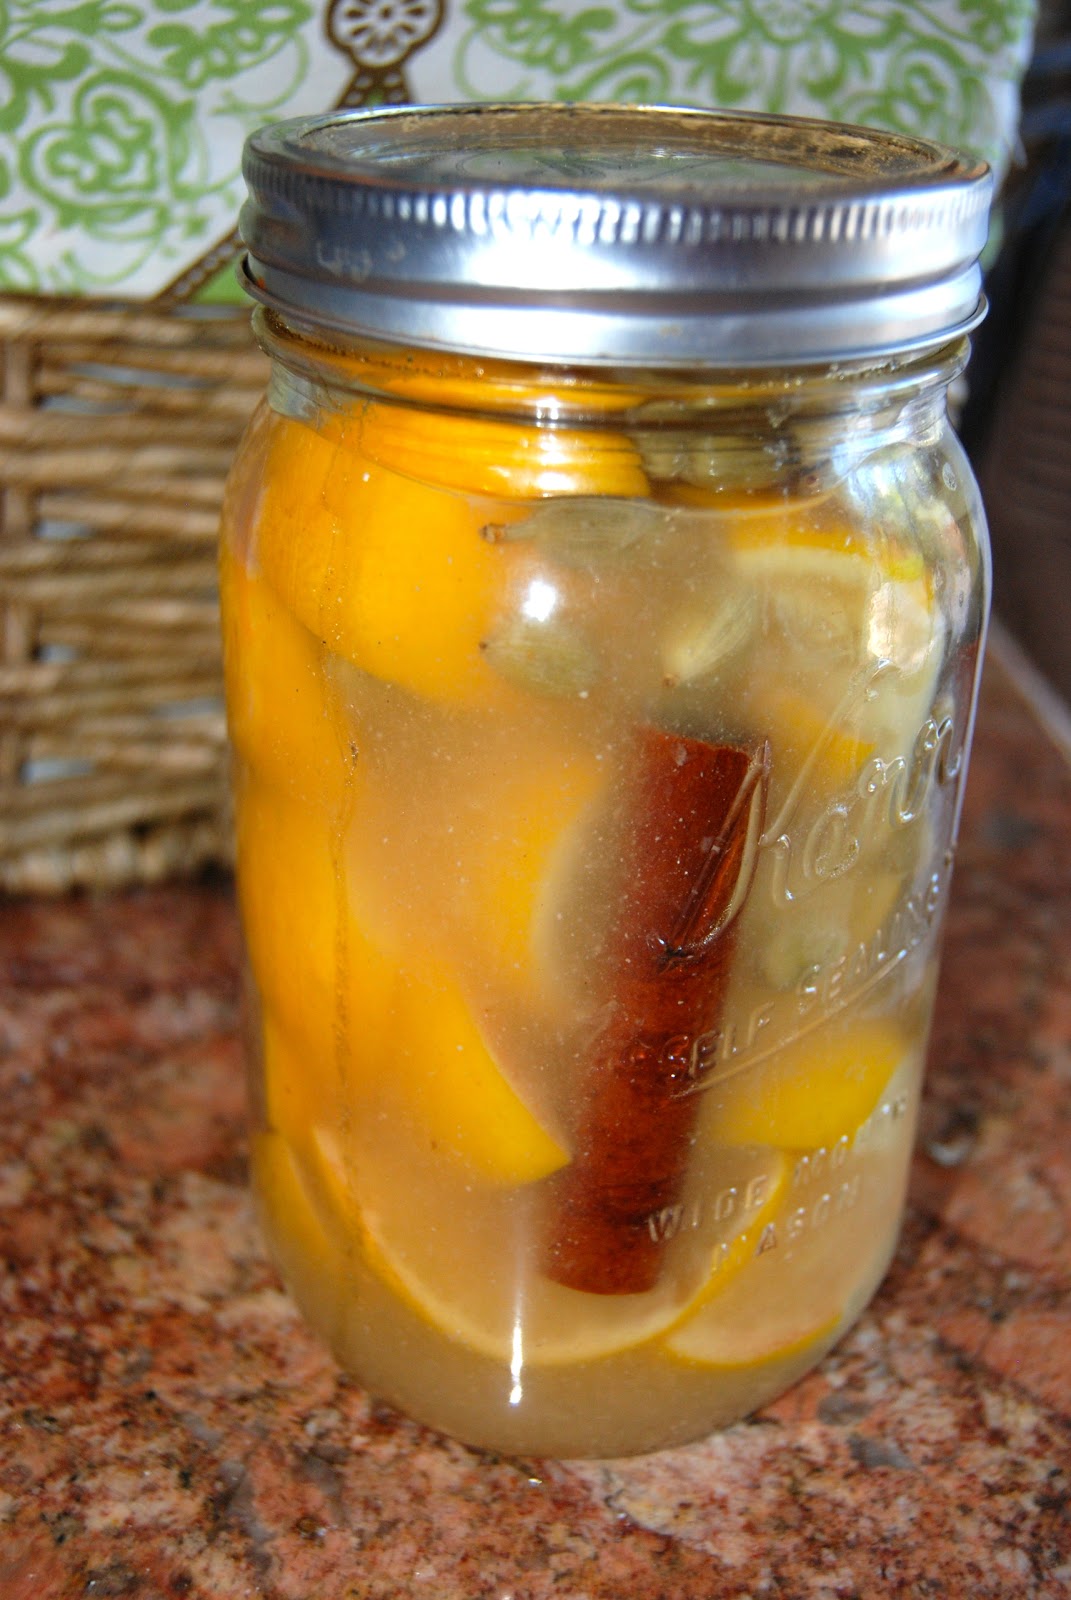
Salted Cultured Lemons and Salads

We have had friends in town for the past few days, so I am a bit behind on my posting, but I would like to post a quick easy way to use my salted, cultured lemons...


I made a nice green salad today and diced a few of these up and put them on my salad with a honey mustard dressing.  It was delicious!  The lemons were light and refreshing and added a nice zing to the salad.

Sunday, May 13, 2012

Cultured Mondays - Sauerkraut in the Harsch Crock

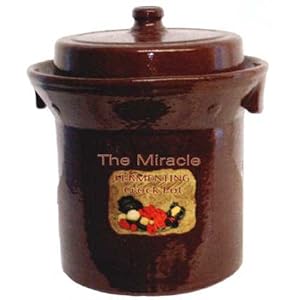
It's Cultured Mondays once again!  A lot of talk about fermentation this past week.  I am looking forward to trying my Harsch crock and Pickl-it jars to see if we notice any difference than when we used Mason Jars.  I have also purchased some glass weights for my mason jars to try.  After lots of thinking and more thinking and reading, I have come to the conclusion that I will probably be sticking to the Harsch crock (since we already had one) and a few pickl-it jars.  I'm on the fence about the mason jars with weights.  Since I have some gut issues that need healing and I have a toddler, I would rather not risk giving us molds and yeasts to eat, which seem to be a risk when using the mason jars.

Picture from www.amazon.com

I'm glad that I am doing Cultured Mondays as it will allow you, my readers, to follow my journey, and will allow me to have a place to record my results.

This past week, I filled my 10L Harsch Crock with 12 pounds of cabbage and a few heads of garlic.  I would normally let the entire thing sit for about 10 weeks, but I plan to harvest this batch a bit early and then get another batch going since we have no sauerkraut to eat right now and we desperately need some.  I see my son's eczema and yeast behind his knees starting to crop up, which seems to go away when he is getting good doses of sauerkraut.

Of course, I forgot to take pictures while I put up this batch, but hope to remember to take some pictures next time.  I also plan to take some time this week to figure out how to use my two pickl-it jars and put up some veggies in them.  Busy fermenting week over here!

How do you all feel about fermenting after reading through some of KerryAnn's posts?

(Featured in The Nourishing Gourmet, Food Renegade)

Wednesday, May 9, 2012

A Fermentation Response From Sandor Katz

Wow!  There has been a lot of fermentation talk on the blogs lately!  In order to be fair to my readers, I would like to post a response by Sandor Katz, who wrote the Book Wild Fermentation.  He basically says that as long as you keep your ferments under the brine, you can continue to use mason jars for fermenting.

It's hard to keep things under the brine, but I just found these glass weights on ebay and plan to buy and try a few of these for some of my ferments.

I guess I am landing a bit in the middle.  I do have some gut issues that I want to heal, so I want to use the pickl-it and Harsch as much as I can.  But, as I heal, I am not opposed to using my mason jars with the glass weights on them.  I am curious to see how those work - my opinion may change again depending on how I like the masons with the weights.  One thing I will stand firm on is that weights are needed if you want to use mason jars for fermenting.  I have not been doing this, but after all the reading over the past few weeks, I see that they are absolutely necessary.

Also, I want to be clear that I do not discount the research that Kerry Ann has done.  I am sure that there are people with very serious gut issues that need to be healed with fermentations that are done in a strictly anaerobic environment.  This may not apply to most people, but just the same, I do think that it applies to some people.  You just have to figure out into which group you fall.  I am not totally sure where I fall yet, which is why I am trying all methods.

Here is the link to the weights:  CLICK HERE

Here is Sandor Katz's response:

"I hear that much controversy is brewing on the internet over vessels for fermenting vegetables, and the implications of whether or not they are totally anaerobic. I have made hundreds of batches of kraut in all sorts of vessels (most of them open crocks), and I have witnessed, consistently, that it doesn’t matter. Each vessel has advantages and disadvantages. No particular type of vessel is critical. People have been fermenting vegetables for millennia in crocks open and closed, in pits and trenches, in sealed and open vessels. It can be done many different ways. The only critical factor is that the vegetables be submerged under brine.

Whenever vegetables are submerged under brine, lactic acid bacteria (which are anaerobic) develop. Whether or not the vessel protects the surface of the ferment from atmospheric oxygen, the microbial development under the brine is anaerobic lactic acid bacteria. In the vocabulary of microbiology, lactic acid bacteria are “facultative” in that they that do not require oxygen, but are not inhibited by its presence; in contrast, certain other bacteria (for example Clostridium botulinum) are “obligate” anaerobes that require a perfectly anaerobic environment.

The only difference air exposure or lack thereof makes is whether aerobic organisms like yeasts and molds can develop on the surface. The barrel of kraut I have had fermenting in the cellar for six months now is good and sour, and I have been eating from it and sharing it widely for months. Each time I remove the cloth tied down over it, and the jugs of water weighing it down, and the two semi-circular oak boards that rest upon the surface, I skim off a moldy layer around the edges and down the middle, wherever the surface was exposed to air. I toss the moldy layer into the compost, and the kraut beneath it looks, smells, and tastes wonderful. Many people have reported how good it made them feel and not a single person has complained of any problems from it, ever. The brine protects the vegetables from the aerobic organisms that grow on the exposed surfaces. The ferment is a lactic acid ferment, even though the surface is aerobic. Surface growth should be scraped away because if it is allowed to grow it can diminish the acidity of the kraut and affect flavor and texture, but if you keep periodically scraping mold away, the ferment beneath is fine.

I have also fermented in Harsch crocks, Pickl-Its, Mason Jars, and many other types of vessels. Mason jars become highly pressurized if you fail to loosen them to release pressure. Even if they are not perfectly airtight, they permit little airflow. Many times I have witnessed carbon dioxide force its way through the airtight seal by contorting the tops to provide an escape for the pressure. The various air-locked designs that allow pressure to release while preventing air from entering the system are generally effective at preventing aerobic surface growth. Yet still I generally do not use them because I love to look at and smell and taste my krauts as they develop, and each time you open an air-locked vessel you defeat its purpose, allowing air in. The vessels are effective, but are not well-suited to my desire to taste at frequent intervals. Different vessels suit different needs and desires. No one type of vessel is essential for fermenting vegetables. I have had success using every type of vessel I could think of. As long as you can keep vegetables submerged, lactic acid bacteria will develop. The process is extremely versatile.

For more in-depth information on fermenting vegetables, fermentation vessels, and all realms of fermentation, check out my new book, hot off the presses, The Art of Fermentation. Keep fermenting…"

Sunday, May 6, 2012

Cultured Mondays - A Switch to Harsch Crocks and Pickl-It Jars

*Update - Please take a minute to read an additional post that I wrote today (5/9/12).  After doing some more reading, and looking at Sandor Katz's response, I am looking at a way to still ferment in mason jars using a glass weight.  While it may not be as superior as the Harsch and Pickl-it, I am hoping that it will still make good ferments and I will be able to still ferment several things at a time without having to buy all new equipment.  While that may work for our family, I do believe that some people need the strict anaerobic environment to heal their guts and would be better off using the Harsch and Pickl-it exclusively.  You just need to decide where your family falls.*


Honestly, I've been dreading making this move...throwing stuff to ferment into a mason jar is so quick and easy, but some recent research has shown that mason jars are not making clean ferments.  Now I have to figure out how to use the pickl-it and I need to lug out my large Harsch crock.

I bought my Harsch crock about 4 years ago when I first started fermenting, but ended up tucking it away as it was heavy and frankly a bit of a pain to use.  I had not heard of pickl-it jars or I probably would have just bought a few of those to start with.


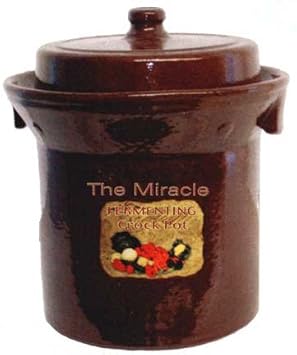
Harsch Crock via amazon.com


But, we LOVE sauerkraut in the house and the Harsch is large enough that I can make a huge batch and since I have it, I will use it.  If I had known about pickl-it, then I would have just bought their 5 Liter Jar, seen HERE, which is a lot cheaper (and I am hoping easier to use) than the Harsch crock.

(I did find this review that had a helpful side by side comparison for pickl-it and the Harsch crock.)

This change has come as the result of some research done by fellow Nourished Living Network member, KerryAnn at Cooking Traditional Foods.  Basically, KerryAnn's research has shown that ferments need an anaerobic environment to create the best healing probiotics for your gut.  Mason jars do not provide this, and often breed molds and yeasts into your ferments.  If you would like to read more about this here are a few links to her posts.

*Salt and Lacto-fermentation
*Three Important Facts About Fermenting
*Knowing My Lacto-Ferment is Finished
*Pickl-it Question and Answer Video
*Lactic Acid Bacteria vs. Probiotic Pills
*How to Use Pickl-it
*Lactic Acid Bacteria and the Mason Jar
*Controversy: Pickl-it Vs. the Mason Jar

I hope you find these posts helpful and are not discouraged to continue to ferment foods.  It is a bit overwhelming leaping into new territory, but you are not alone and my next few Cultured Mondays posts will take you on my journey as I switch over to a new kind of fermenting experience.

I am looking forward to reaping the healthy results of my hard work!  So, stick with me and you may find you want to do it too!

(Featured on Healthy Home Economist, Homestead Revival, Real Food Forager, GNOWFGLINS, The Nourishing Gourmet)

Sunday, April 29, 2012

Cultured Mondays - Warm Feta Quinoa Salad with Salted, Cultured Lemons

It's Cultured Mondays again!!  How is everyone doing with their cultured foods goals?  We have been enjoying my cultured "orange-ade" all week; working our way through gallon two right now!  So yummy - my husband and son both love it.

This week I am going to give you a recipe using the salted, cultured lemons that I made a while back.  These lemons are simply amazing and I am having fun finding ways to incorporate them into different recipes.  I think this is my favorite use so far - I wish I had a picture of the salad, but it simply vanished into our mouths before I could take a shot!

Salted, Cultured Lemons
Warm Feta Quinoa Salad with Salted, Cultured Lemons

*1 1/2 cups dried quinoa (if you have the time you can soak the dried quinoa with 1 T apple cider vinegar or whey and 3 cups of water for 8 hours to help remove phytic acid, which is a nutrient inhibitor)
*3 cups of bone broth or water
*8 ounces feta cheese
*2 small cucumbers, cut in bite sized pieces
*3/4 cup sun dried tomatoes or 1 1/2 cups fresh tomatoes, cut into bite sized pieces
*1/2 cup minced fresh parsley leaves
*1/3 cup minced cultured lemons
*salt to taste

Combine quinoa and broth (if you soaked the quinoa, then discard soaking water and rinse well; if you did not soak your quinoa, then you can rinse it well before combining it with the broth).  Simmer on low for 15-20 minutes until the broth or water is absorbed, then fluff and remove from heat.  While the quinoa is cooking, chop your cucumber into bite sized pieces.  If you use fresh tomatoes, you can cut these into bite sized pieces as well.  Mince your cultured lemons and parsley.  Place your cooked quinoa into a large bowl.  Allow 15-20 minutes to cool so that quinoa is warm, but not hot.  Add your cucumbers, tomatoes, parsley, and lemons.  Stir well to combine.  Lastly add your feta cheese, crumbing it well.  Stir a few times to incorporate the cheese into the rest of the ingredients.  Salt to taste.  I found this needed little to no extra salt.  Enjoy!  This can also be eaten cold. 


Sunday, April 22, 2012

Cultured Mondays: Cultured Orange-ade; a Delicious, Probiotics Soda

It's Cultured Mondays again!   I hope some of you had a chance to try my Cultured Lemonade Recipe; our family downed two gallons in just under 2 weeks and now we are having trouble keeping our hands off this Orange-ade.

Here in SoCal, I am often inundated with citrus; not a bad thing...it's just that plain old citrus juice can be boring.  Well, after making this orange-ade, I don't think we will ever drink plain old citrus juice again!  Even my two year old gave this a huge thumbs up!

This recipe is super easy to make and won't last long in your house:

*2 cups of fresh squeezed orange juice (you can also add in some grapefruit, tangerine, or a lemon or two if you don't have enough oranges, which is what I did)
*1 cup sucanat (unprocessed sugar) or if you don't have this, then 3/4 cup regular sugar
*1 cup of whey (or if you made my lemonade last week and have some left, you can use 1 1/2 cup of that as a starter)
*A gallon sized glass jar
*Filtered water


Add your juice, sucanat, and whey to your glass jar.  Fill the remainder of the jar with filtered water, leaving 2 inches from the top, and place lid on jar.  Place in a dark spot (kitchen cabinet works great) and leave out for 2-3 days, depending on the temperature.  The ideal fermenting temperature is 70 degrees, so if it is a bit warmer, it will be ready sooner, and if it is cool, it may need an extra day.  You will know it is ready when it tastes fizzy like soda and has lost some of it's sweetness.  You can leave it out another day or two after that, but will need to feed it another cup of sucanat, as the probiotics feed on the sugar.  If you want it a bit sweeter, then add a little raw honey to your cup when you drink it.  Enjoy!!

(Featured on the Healthy Home Economist, Homestead Revival, Real Food Forager, Cooking Traditional Foods, GNOWFLGINS, The Nourishing Gourmet, Food Renegade)

Sunday, April 15, 2012

Cultured Mondays - Pickled (Lacto-fermented) Celery (Heirloom Variety Used)

It's Cultured Mondays again!  How are your culturing goals coming along?  We have been faithfully eating at least one cultured food a day, and I am hoping to increase to two a day soon.
Yup, this is celery!  An organic, heirloom version.
My fellow blogger at the Nourished Living Network, Wardeh at GNOWFGLINS, has written an amazing book with about 150 fermenting recipes.  Yup, 150!  I'm learning that almost everything can be fermented.  You can find her book, The Complete Idiot's Guide to Fermenting Foods, HERE.  I highly recommend this book for anyone who wants to learn how to ferment foods.

Another fellow blogger, founder of the Nourished Living Network, KerryAnn, just had a wonderful post about fermenting the proper way, on her blog, Cooking Traditional Foods.  I learned so much from this post.  Here is the link if you are interested.  After reading this, I plan on placing my ferments in my Harsch Crock and I just bought two pickl-it jars to try, so I will update you on how I like using these.  I'm learning that while mason jars will give you some probiotics, they will not give you the best.  So, while I may use mason jars here and there, I will be converting over entirely to anerobic fermenting containers in the coming month.

Now, onto the celery! I was perusing the farmer's market on Saturday, looking for something fun to culture this weekend.  It's spring and chilly, and mostly greens, beets, and carrots abound this time of year.  But then these beautiful red stalks caught my eye and I was thrilled to have stumbled upon some organic heirloom celery.  I have never seen this red celery before, but here it is!  And the taste . . . imagine the normal celery taste but ten times stronger.  This celery is delicious, and I think its the way God intended celery to taste.


This recipe is very easy.  Here is what you need:

* One 6 cup or two quart sized glass canning jars
* Four stalks, plus a few pieces of the heart cut into 3-4 inch sticks; can include a few leaves if you like
* One small head of garlic
* Two sprigs of rosemary and a few sage leaves or fresh herbs of choice; or none at all
* Four tablespoons of pink or sea salt
* Two tablespoons of whey
* Around 5 cups of filtered water


Wash your celery, garlic (skins off), and herbs thoroughly, cutting off any damaged or brown pieces.  Cut your celery into 3-4 inch stick sized pieces.  Take each piece of garlic and cut in half any large pieces, then lightly crush each clove.  Add all your vegetables and herbs to your jar along with your salt and whey.  Then add your filtered water.


Give the jar a few shakes to help distribute the salt and whey throughout the water.  Set in a dry, dark place (a kitchen cabinet is fine) and allow to sit for about a week (if very warm, then check after 4-5 days, but if cooler, then it will probably need a week, as the ideal fermenting temperature is around 70 degrees).  Once your celery is done fermenting, move to the refrigerator.

(Featured on Healthy Home Economist, Homestead Revival, Real Food Forager, Cooking Traditional Foods, The Nourishing Gourmet, GNOWFLGINS, Food Renegade, Real Food Freaks)

Sunday, April 8, 2012

Cultured Mondays - Lacto-Fermented Lemonade


This week I am posting a recipe for Lacto-Fermented Lemonade.  This came out delicious and is a less sweet version of your typical lemonade; plus it's full of probiotics, a win-win!  It had an amazing fizz to to it, just like soda does, and it was fun to actually hear it bubbling away!

My husband brought home some lemons from a co-worker this past week that were the biggest lemons I have ever seen in my life!  Some of them looked like they were maybe meyer lemons that had been crossed with oranges, as they were so large with very smooth skins and an orange tint to the inside.


I got 8 cups of lemon juice from these lemons!  So, I put up 2 gallons of my lemonade.  I will give you the measurements for one gallon of lemonade.  

*2 cups of lemon juice
*1 cup of sucanat
*1 cup of whey
*1 gallon, minus 3 cups, of filtered water

Simply pour all the ingredients in the the gallon jar, giving the water a good stir to help dissolve the sugar (some of it will end up on the bottom, but that is OK).

Place the lid on the jar and set in a dark place for two days.  You will be surprised to taste how carbonated this drink has become.  It's just like soda!  
Now, this is not a sweet drink, so if you want it a little sweeter, you will need to add some raw honey or extra sucanat.  I also recommend not drinking this on an empty stomach and starting out with half a cup with a meal, as it is a pretty powerful drink.  It can be placed in the fridge after two days.  Because this beverage is going to naturally produce some alcohol, I would avoid drinking this while pregnant.

My lemon juice - can you see how orange it is?  That is why I think these lemons must have crossed with some oranges!

Sunday, April 1, 2012

Cultured Mondays - Roasted Chicken and Salted, Cultured Lemons

It's Cultured Mondays and today I have a recipe for a tasty way to use the Salted, Cultured Lemons I posted a number of weeks back.  These lemons are delicious and using the Meyer lemons allows you eat the lemons whole, skins and all.

I roasted an heirloom variety chicken that I bought from my local organic chicken farmer.  To use the lemons, I simply diced one and sprinkled it over the roasted chicken.  The intense salt, lemon taste really complemented the chicken.  My husband loved this and now I have a yummy, easy way to use these delicious lemons!

How are your fermenting and culturing goals going?  We are really enjoying our daily use of cultured and fermented foods.  This morning I threw some of my cultured ginger and cultured tangerines into our morning smoothie.  So good!!

(Featured on Healthy Home Economist)

Sunday, March 25, 2012

Cultured Mondays - Some Link Love...

So, we have been fighting off some colds around here and I was not able to get a cultured recipe out this week.  But, one of my fellow Nourished Living Network Bloggers, over at Pickle Me Too, has a lovely recipe for Brine Pickled Celery.  Click, HERE, to take a look at her recipe!

In the meantime, we have all been consuming a lot of THIS!