Sunday, March 17, 2013

Crock-Pot Oatmeal

I wanted to share this recipe from my sister Christy, over at Whole Foods on a Budget.  Crock-pot oatmeal has recently become my "go-to" breakfast for Monday mornings.  Prepping the night before and having breakfast ready and waiting on Monday morning is such a treat and helps me get a good start on the week, in this busy season of life!


You can read the recipe HERE.  I have found that this makes enough for me, my husband, and three year old with enough left-overs to warm up with a little water on Tuesday morning, so it's actually two days that I don't have to do any breakfast prep.  To get 2 days worth out of the recipe, I have tweaked it just a bit for us:

*I do a heaping cup of oat groats, probably closer to 1 1/4 cups and therefore add about 1/2 cup extra water.
*I add three apples, chopped into bite-sized pieces and place them on the bottom of the crock-pot, along with 1/3 cup raisins.
*With the apples and raisins, I have found that we need no extra sweetener.
*I like to add walnuts or pumpkin seeds to the oatmeal AFTER it is done cooking and just before we eat it.
*Every crock-pot is different and I found my oatmeal sticking a lot, so I have found that if my husband starts it cooking around 11, it does not stick as much.  Also, placing the apples in the crock pot first and then putting the oats in has helped reduce sticking.
*I also like to soak my oats to reduce phytic acid, which inhibits mineral absorption.  To soak, I place the oat groats in a bowl and cover with water.  I add 1 T apple cider vinegar and then I let it soak 6-8 hours; which means I usually start soaking around 4 in the afternoon.

Wednesday, March 13, 2013

The Olive Curing is Done!


Better late than never!  I realized I forgot to post about my finished home-cured olives.  These were pretty easy, (though a bit time consuming), to do, and they came out absolutely delicious!  I bought my organic, raw olives from Chaffin Family Farms (who also sell all kinds of other yummy things!).  You can read my post HERE about how I salt cured my olives.

Above are my finished olives.  I rinsed the salt off and they have a delicious mildly salty taste unlike any olives you would find that have been lye brined.  I'm sold on salt brining olives and look forward to doing this again - maybe adding some herbs and spices to them next time around.

If you are new to curing olives, I would recommend starting with black olives and doing the salt cure.  It was a very easy process, great for beginners.

Below is some sourdough ciabatta I made with the olives - so good!


Monday, March 11, 2013

Sealogica Availability...

Due to some very busy months ahead, I am taking a temporary break from selling Sealogica and hope to resume around August.  I will take orders until the end of the week (maybe next week as well), so if you would like to order, this would be the time to do it.

Thanks and I hope you give it a try!

Thursday, February 21, 2013

Onion Poultices

Have you ever used an onion poultice?  This used to be a "go to" by our great-grandmothers and their mothers before them, but with the advent of modern medicine, these valuable poultices were left behind.

I was happy to rediscover them about a year ago when my son had croup.  I used onion poultices on him and was very happy with the results.  They really helped with his congestion and cough.

Recently, I stumbled across THIS post by Bear Medicine Herbals all about onion poultices and onion syrups.  This is a keeper post for sure!  Kiva Rose, the author, is an amazing herbalist!  Check out her post HERE and give her recipes a try.


Photo Credit: eats.com


(Featured on the Prairie Homestead Blog Hop)

Friday, February 15, 2013

Garlic "Citrus-Aide"

This batch was made with lemons and blood oranges.

We have been enjoying various forms of garlic lemonade, a recipe that we picked up from one of my favorite herbalists, Aviva Romm.  

As you can see from the above picture, my son is a big fan and we drink this almost daily these days to help keep away those cold and flu bugs.  This can be given to kids age 2 and above.  It usually takes me and my son two days to get through a batch of this yummy drink.  These can also be made into yummy popsicles for the kids.  

Here is my adaptation:

*6 cup ball canning jar
*3 large garlic cloves or 4-5 medium cloves ( you can use less if you prefer)
*2 lemons
*1-3 other citrus fruits (we have used regular oranges, blood oranges, and grapefruits)
*raw honey to taste
*5 or so cups of hot water

Place 5 cups water on stove to boil.  While water is heating, chop up garlic and place in canning jar.  When water has come to a boil, pour over garlic and cover with lid.  Allow to cool (usually takes at least an hour) so that jar is warm, not hot to touch.  Juice your citrus fruits and add to jar.  Stir in raw honey to taste.  Enjoy!

*Due to the raw honey, I do not recommend giving this to children under the age of 2.


Sunday, February 10, 2013

Great Co-Sleeping article

I recently read a great article on the benefits of co-sleeping and want to pass it along.  We jumped into the co-sleeping a little late in the game (you can read about my experience HERE), but are still going strong!  My son recently turned 3 and we are all still enjoying all the benefits of co-sleeping.


I liked THIS article so much because it describes 5 main benefits of co-sleeping PAST infancy.  This is a great read for everyone!  I hope you enjoy it and pass it on to anyone you may think is interesting in co-sleeping with their little ones.

Thursday, February 7, 2013

Fermented Cod Liver Oil

I know, the name is not the most appealing thing in the world.  It took me a little while to jump in and decide to give it a try.  But, I am SO happy that my family is taking it consistently these days.  I have noticed since starting it, that we have stayed healthier as a family and when someone has started to feel sick or has come down with something, the recovery time is much quicker.

Thankfully, since this winter has started, we have only had one cold (the hubs) and his recovery has been super speedy; even he was surprised at the difference.  I know that it is not entirely the cod liver oil, but I think it is a big player!  We have also focused on taking frequent doses of elderberry syrup, LOTS of handwashing, keeping sugar consumption low and none when we are out in public (sugar lowers your immune system for about 4 hours after consuming), and taking our daily Sealogica.  I also throw in some Green's Mix for the whole family along with Herbs for Kids herbal supplements as needed for my son, along with a few other things.


I would highly encourage you to give the fermented cod liver oil a try.  It comes in liquid or capsules, and you can get the liquid flavored.  My 3 year old actually gets excited to take his every day.  I give him his with a little spoonful of jam.  My husband takes the capsules, and I brave the plain liquid.  It's really not that bad (just hold your nose and have something to eat right after).

You can find the fermented cod liver oil HERE.  (I am not an affiliate, I just really like this product.)

I really liked THIS post by Balanced Bites.  It includes a lot of information about the benefits of fermented cod liver oil, along with recommend doses.

Tuesday, January 29, 2013

Essential Oil Review for J&M Botanicals Essential Oils...

Finding high quality, organic essential oils can be a bit of a challenge these days.  Essential oils can be amazing, healing tools and it's important to buy from companies that carry high quality oils.  I'm very excited to do a review of J&M Botanicals and the new line of organic essential oils they now carry.


I was sent a sampling of six essential oils and they are lovely!  Their scent is bright, clean, and fresh.  The key pieces of information a consumer needs before purchasing can be found with each oil.   The buyer can clearly see the country of origin, parts used, organic status, method of distillation and more.

Another report that is included is the GLC analysis.  This allows the buyer to see the chemical constituents that make up the essential oil, which can be a helpful tool in picking out a high quality, unadulterated oil.

J&M Botanicals is a small company and able to have a direct relationship with their producers of their oils, which is very important.  They know how their farmers and distillers are producing these essential oils. If you are looking for high quality essential oils, I can highly recommend buying from J&M Botanicals.

A fun feature that J&M Botanicals includes with the description of most of the oils is a practical project using the essential oil, from foot powder to citrus kitchen scrub, lavender skin soothing spray and many more!

An added bonus is a free 8 week mini-course that can be sent to you by email.  This course includes a short lesson, a featured essential oil, tips and safety information, and projects and uses for the featured oil; and it's FREE!  Click HERE to sign up.

To learn more about J&M Botanicals, click HERE, and enjoy not only their line of essential oils, but their high quality skin and body products.  J&M Botanicals is also associated with Vintage Remedies, a company that is dedicated to helping others learn about natural health.  If you are interested in learning more about aromatherapy, they have a new distance learning program called Foundations of Aromatherapy, which you can read more about HERE.


(Disclosure:  I am an affiliate for Vintage Remedies.  Using my link is like saying "thank you" and a way to support this blog.)

Monday, January 7, 2013

Cough and Cold Season

I hope you all had a lovely winter holiday season!  This was our first Christmas in two years that no one was sick with a cold or croup and we thoroughly enjoyed ourselves!

This time of year, the questions and emails start to trickle in about how to treat the flu, coughs, and colds with natural remedies.  I thought I would link to some previous posts I have done regarding this subject.

One of my new favorite prevention brews is one I learned about this year from herbalist and physician Aviva Romm.  It's called garlic lemonade.  This might sound odd, but it's really quite yummy and my 3 year old loves it.  To make, simply take 2 chopped cloves of garlic and add them to a quart sized jar.  Fill the jar with boiling water and let sit for 30 minutes.  Add the juice of one lemon and raw honey to taste.  Enjoy!  (Be sure not to give to children under the age of 2 due to the raw honey).  This drink is great for kids and adults (I have my mug of it sitting next to me right now).  I like it both hot and cold, but I think I like it best hot.  You can find her recipe in here in Naturally Healthy Babies and Children, along with many other fabulous recipes and advice for treating sick children naturally.  It's one of my go-to books for my toddler.

Here are some links to previous posts with some natural remedies.

This is used in the sore throat gargle and  works quite well!
Fennel Cough Syrup

Elderberry Syrup

Preparing for Cold and Flu Season

Sore Throat Gargle

(Disclosure:  I am an affiliate for amazon.  Any use of the link above will help to support this blog and is a nice way to say "thank you".  I appreciate all the support I get from my readers.)

Monday, December 31, 2012

Happy New Year!

Many thanks to all who read and help to support my blog!  I wish you all a happy and healthy New Year!

Monday, December 17, 2012

Diaper Changing Technique Reduces Colic


I had to share this fascinating article by GreenMedInfo.com about a diaper changing technique that will help to reduce colic in infants.

Infants are born with immature spines that need to strengthen and develop over the next 6-9 months of their life.  Unfortunately, most of us parents do the double leg lift with our children when we are changing the diaper.  This is not good for the spine of infants and can affect the nerve center that controls digestion.

By instead, switching to a side roll diaper changing technique, the nerve center will not be pinched and irritated and should help to stop and/or reduce colic in many babies.

HERE is the full article which includes a link to a video which is so helpful to watch.  Please pass this on to any new parents you know!

Thursday, December 6, 2012

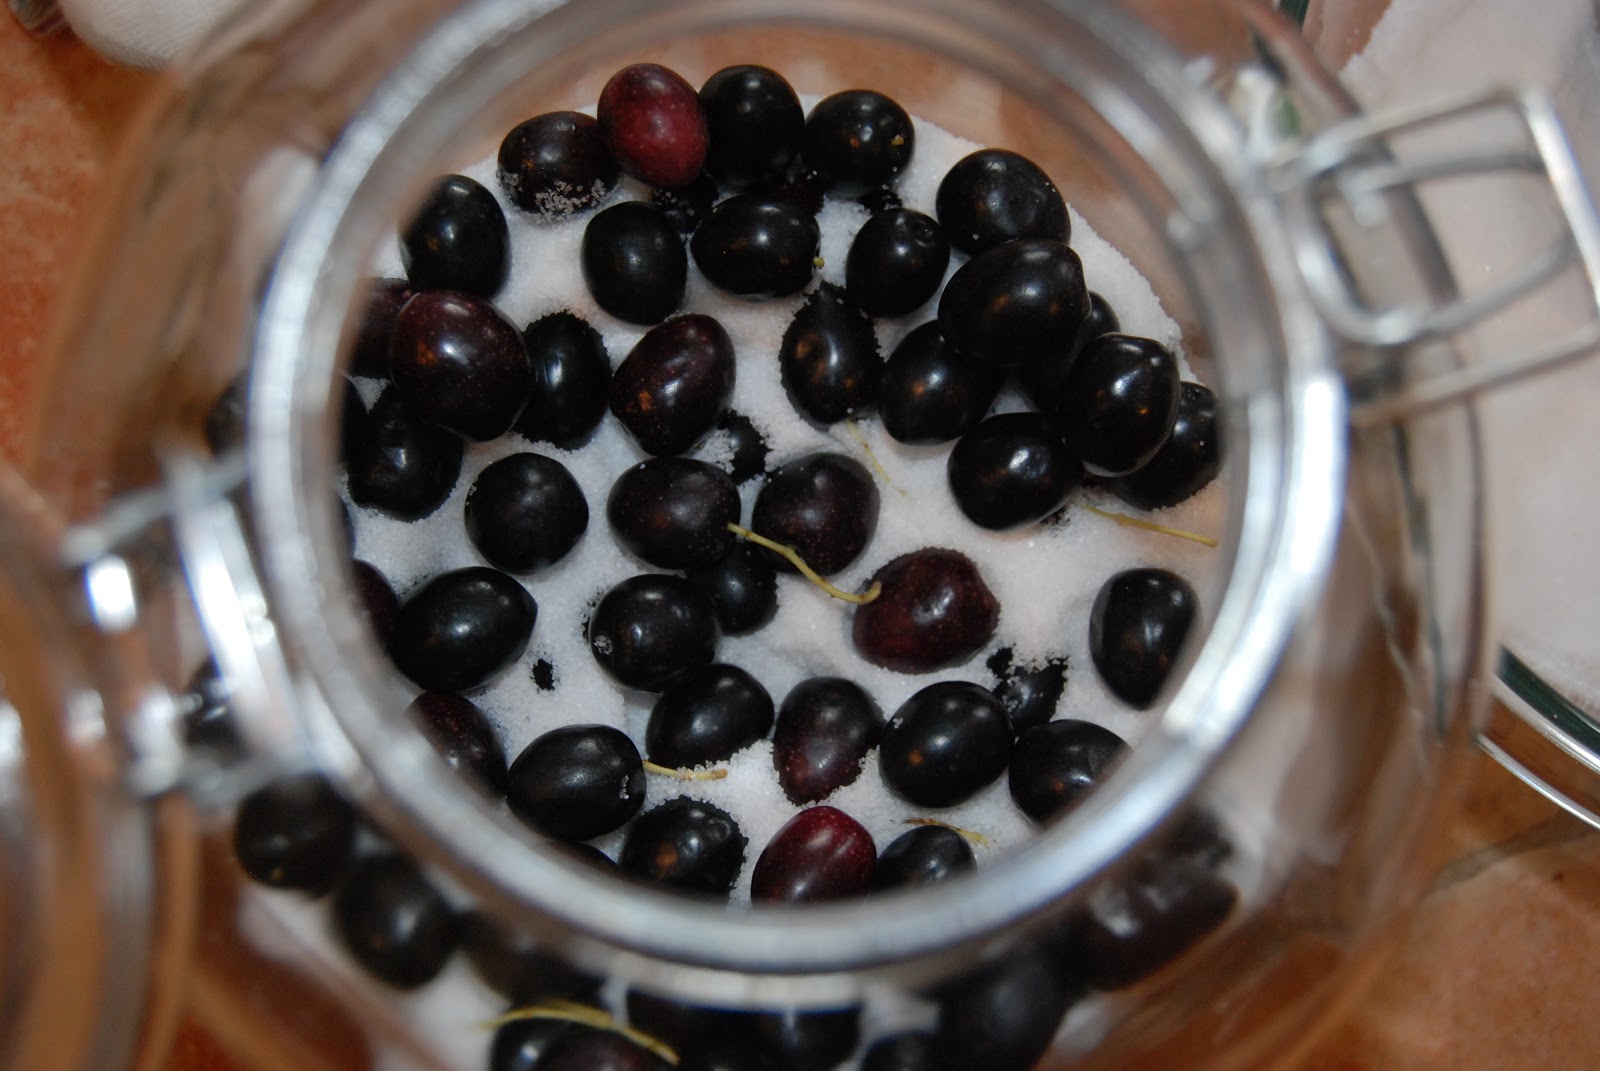
Curing Mission Olives


As promised, here is my update on curing my mission olives.  I have about 17 pounds to cure and started the process today.  I'm washing and then drying the olives and packing the 17 pounds in about 25 pounds of sea salt.  I'm using glass Fido jars and layering the olives and salt.  The tops will remain open to allow for air circulation.  The salt is supposed to pull the oil out of the olives which I will pour out of the jars.  Well see!  Hopefully this works!