
Thursday, May 3, 2012
Whole Foods Friday - Make Your Kid's Meals Colorful and Fun
I love this post from my sister, Christy, over at Whole Foods on a Budget. In her post, she discusses how to make kid's meals fun and colorful using whole and nutritious foods. So hop on over to her blog and check out this fun post!


Wednesday, May 2, 2012
Rose and Orange Body Sugar Scrub
My amazing instructor, Jade Shutes, at The East-West School of Herbal and Aromatic Studies, where I am studying aromatherapy, put up this delicious looking recipe for a body sugar scrub. I can't wait to make this, this weekend!

Also, if you are interested in Aromatherapy and integrating this amazing healing tool into you and your family's life, sign up for Aromatherapy 101 this month, as tuition goes up next month!
Here is the recipe for the sugar scrub...
(PS - If you don't have calendula infused oil on hand, just use plain olive oil and if you don't have the essential oils on hand in the recipe, you can do 14 drops of lavender and 14 drops of sweet orange essential oils.)

Also, if you are interested in Aromatherapy and integrating this amazing healing tool into you and your family's life, sign up for Aromatherapy 101 this month, as tuition goes up next month!
Here is the recipe for the sugar scrub...
(PS - If you don't have calendula infused oil on hand, just use plain olive oil and if you don't have the essential oils on hand in the recipe, you can do 14 drops of lavender and 14 drops of sweet orange essential oils.)
Monday, April 30, 2012
Great Post on Cloth Diapering
Yup! I'm a cloth diapering mama! I have been doing it for 2 1/2 years and I love seeing more and more of my friends hopping on the bandwagon. I saw a post today by Cheeky Bums Blog that I thought was very helpful for those who are looking to get into cloth diapering.
You can read the Cheeky Bums Blog post HERE.
I personally have used organic prefolds with simple organic cotton covers (started out with wool, but my son had a sensitivity to it). I, too, use the Thirsties pre-wash and super wash for washing my diapers. I am very happy with my decision to cloth diaper, not only to save money, but because of the many chemical dangers that come from using disposable diapers, which you read in detail about on Cheeky Bums Blog post - some interesting information new to me about the harm disposable diapers can cause baby boys in terms of future sperm production.
Is it more work to do cloth than disposable; are there days (especially as I am cleaning poo off a cloth diaper) that I wish I could just use disposables? Yes to both questions - and this is normal! Cleaning poo off cloth diapers is not fun, but I would not trade cloth for disposables. Sacrifices are often necessary for keep your kids safe and this is one sacrifice I am happy to make!
You can read the Cheeky Bums Blog post HERE.
I personally have used organic prefolds with simple organic cotton covers (started out with wool, but my son had a sensitivity to it). I, too, use the Thirsties pre-wash and super wash for washing my diapers. I am very happy with my decision to cloth diaper, not only to save money, but because of the many chemical dangers that come from using disposable diapers, which you read in detail about on Cheeky Bums Blog post - some interesting information new to me about the harm disposable diapers can cause baby boys in terms of future sperm production.
 |
| Picture of the prefolds I use bought from www.greenmountaindiapers.com |
Is it more work to do cloth than disposable; are there days (especially as I am cleaning poo off a cloth diaper) that I wish I could just use disposables? Yes to both questions - and this is normal! Cleaning poo off cloth diapers is not fun, but I would not trade cloth for disposables. Sacrifices are often necessary for keep your kids safe and this is one sacrifice I am happy to make!
Sunday, April 29, 2012
Cultured Mondays - Warm Feta Quinoa Salad with Salted, Cultured Lemons
It's Cultured Mondays again!! How is everyone doing with their cultured foods goals? We have been enjoying my cultured "orange-ade" all week; working our way through gallon two right now! So yummy - my husband and son both love it.
This week I am going to give you a recipe using the salted, cultured lemons that I made a while back. These lemons are simply amazing and I am having fun finding ways to incorporate them into different recipes. I think this is my favorite use so far - I wish I had a picture of the salad, but it simply vanished into our mouths before I could take a shot!
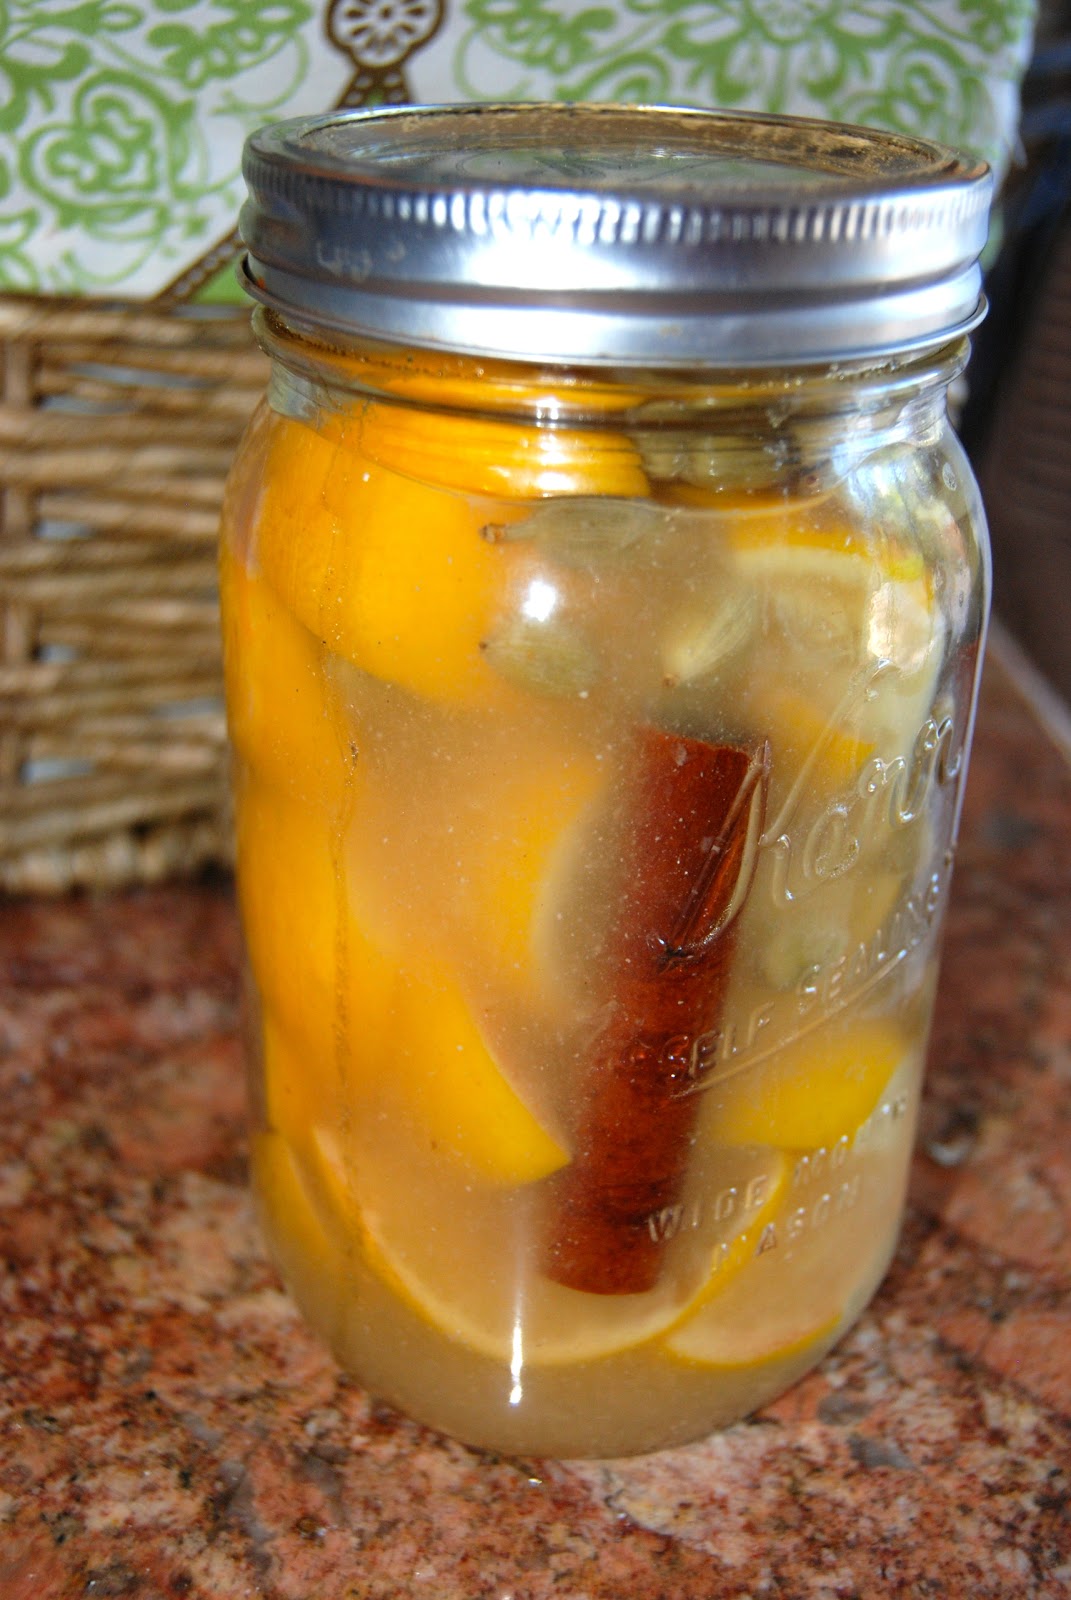 |
| Salted, Cultured Lemons |
Warm Feta Quinoa Salad with Salted, Cultured Lemons
*1 1/2 cups dried quinoa (if you have the time you can soak the dried quinoa with 1 T apple cider vinegar or whey and 3 cups of water for 8 hours to help remove phytic acid, which is a nutrient inhibitor)
*3 cups of bone broth or water
*8 ounces feta cheese
*2 small cucumbers, cut in bite sized pieces
*3/4 cup sun dried tomatoes or 1 1/2 cups fresh tomatoes, cut into bite sized pieces
*1/2 cup minced fresh parsley leaves
*1/3 cup minced cultured lemons
*salt to taste
Combine quinoa and broth (if you soaked the quinoa, then discard soaking water and rinse well; if you did not soak your quinoa, then you can rinse it well before combining it with the broth). Simmer on low for 15-20 minutes until the broth or water is absorbed, then fluff and remove from heat. While the quinoa is cooking, chop your cucumber into bite sized pieces. If you use fresh tomatoes, you can cut these into bite sized pieces as well. Mince your cultured lemons and parsley. Place your cooked quinoa into a large bowl. Allow 15-20 minutes to cool so that quinoa is warm, but not hot. Add your cucumbers, tomatoes, parsley, and lemons. Stir well to combine. Lastly add your feta cheese, crumbing it well. Stir a few times to incorporate the cheese into the rest of the ingredients. Salt to taste. I found this needed little to no extra salt. Enjoy! This can also be eaten cold.
(Featured on Healthy Home Economist, Nourishing Treasures, The Prairie Homestead, Real Food Forager, GNOWFGLINS, The Nourishing Gourmet, Food Renegade)
Friday, April 27, 2012
Make Your Own Vanilla Extract
I love making my own vanilla extract! It's much cheaper than buying it at the store and by making your own, you know that yours is completly pure. I have been able to find organic vodka at our local beer and wine specialty store, which made me very excited!! My sister, at Whole Foods On a Budget, has an easy recipe, so hop on over HERE and check out just how quick and easy it is to make your own vanilla extract.

Thursday, April 26, 2012
How to Make an Aromatic Hand Salve
Making your own aromatic hand salve is easy and fun. Here is a basic recipe, but feel free to make yours a little firmer (add more beeswax) or more slippery (add more oil).

For this recipe you will need:
*3/4 cup of olive oil
*1 ounce of beeswax
*one 8 ounce darkened glass containers (Mountain Rose Herbs carries THESE)
*Spring time blend:
~24 drops lavender essential oil
~24 drops sweet orange essential oil
~12 drops ylang ylang
(You need to be sure that you are using essential oils that are organic and high quality to avoid pesticide or inferior oil contamination which can cause reactions to oils. I have listed on my blog a few places that carry high quality oils, which include Mountain Rose Herbs.)
In a glass pot, heat oil and beeswax on medium heat until beeswax is melted, then remove from heat immediately. Remove the lid from your glass jar. Add your essential oils to your jar and place lid back on the jar. Gently roll jar in your hands for 30-45 seconds to allow the essential oils to blend, forming a synergy. Your oil and beeswax should still be melted at this point, but if it has hardened at all, gently reheat, then pour over your blend. Use a wood skewer or handle of a plastic spoon to stir your blend together. Stir thoroughly to blend the essential oils into the olive oil and beeswax. Allow to harden. Use as needed for dry hands.
Disclaimer: Some of the links in my posts are for affiliate sites. I only recommend sites that I use and enjoy. I do receive a small commission which helps to pay for the costs of running this site. Any orders placed are much appreciated and like leaving me a little "Thank You".
(Featured on GNOWFGLINS)

For this recipe you will need:
*3/4 cup of olive oil
*1 ounce of beeswax
*one 8 ounce darkened glass containers (Mountain Rose Herbs carries THESE)
*Spring time blend:
~24 drops lavender essential oil
~24 drops sweet orange essential oil
~12 drops ylang ylang
(You need to be sure that you are using essential oils that are organic and high quality to avoid pesticide or inferior oil contamination which can cause reactions to oils. I have listed on my blog a few places that carry high quality oils, which include Mountain Rose Herbs.)
In a glass pot, heat oil and beeswax on medium heat until beeswax is melted, then remove from heat immediately. Remove the lid from your glass jar. Add your essential oils to your jar and place lid back on the jar. Gently roll jar in your hands for 30-45 seconds to allow the essential oils to blend, forming a synergy. Your oil and beeswax should still be melted at this point, but if it has hardened at all, gently reheat, then pour over your blend. Use a wood skewer or handle of a plastic spoon to stir your blend together. Stir thoroughly to blend the essential oils into the olive oil and beeswax. Allow to harden. Use as needed for dry hands.
Disclaimer: Some of the links in my posts are for affiliate sites. I only recommend sites that I use and enjoy. I do receive a small commission which helps to pay for the costs of running this site. Any orders placed are much appreciated and like leaving me a little "Thank You".
(Featured on GNOWFGLINS)
Tuesday, April 24, 2012
Milk Thistle Seed: The Liver Tonic
I love milk thistle seed! It's one of my favorite herbs to take, as it is so beneficial for the liver. Since the liver is such a critical organ in our body, we need to take good care of it, and milk thistle is an excellent herb to take for liver support.

Just what does the liver do and why is it important? These are just a few of the important functions of the liver:
*Controls the production and removal of cholesterol
*Makes clotting factors
*Produces immune factors such as gamma gobulin
*Creates bile to help digest food and absorb nutrients
*Helps to clear the body of waste, toxins, and drugs
*Stores vitamins, minerals, and sugars
*Breaks down and eliminates excessive hormones
*Helps to maintain blood pressure
Again, these are just a FEW of the many functions of the liver...so you can see the importance of supporting the liver and keeping it healthy!
Milk thistle seed is an extremely beneficial and healing herb for the liver. These are a few of the possible health benefits of milk thistle seed related to the liver (it has numerous other benefits for other parts of the body):
*Helps to support the liver's ability to regenerate damaged tissue
*Reduces inflammation of the liver and gallbladder
*Improves digestion by stimulating bile production
*Helps to detoxify the liver from poisons like pollution and alcohol
*Provides the body with antioxidants
*Helps to treat cirrhosis of the liver, jaundice, and chronic hepatitis
Milk thistle can be taken in three different forms; capsules, tincture, and tea. There are different benefits that can be derived from taking it in each of it's three forms, so I recommend rotating how you take your milk thistle seed. Try rotating through a tincture form, then capsules, then making your own tea.
To make a milk thistle tea, crush 2 teaspoons of seed with a mortar and pestle, then pour one cup of boiling water over the seeds and allow to sit for 30 minutes before you drink. You can drink one cup a day. You can buy organic milk thistle seed at Mountain Rose Herbs by just clicking on my link to the right.

As with any herb, I do recommend taking a break and not taking it daily for extended periods of time unless you are under the guidance of a certified herbalist. I am not a licensed medical provider and the information in this post should not be construed as medical advice. If you chose to use milk thistle seed, you will be taking responsibility for your own health and wellness; the FDA has not evaluated this herb.
(Featured on the Healthy Home Economist)

Just what does the liver do and why is it important? These are just a few of the important functions of the liver:
*Controls the production and removal of cholesterol
*Makes clotting factors
*Produces immune factors such as gamma gobulin
*Creates bile to help digest food and absorb nutrients
*Helps to clear the body of waste, toxins, and drugs
*Stores vitamins, minerals, and sugars
*Breaks down and eliminates excessive hormones
*Helps to maintain blood pressure
Again, these are just a FEW of the many functions of the liver...so you can see the importance of supporting the liver and keeping it healthy!
Milk thistle seed is an extremely beneficial and healing herb for the liver. These are a few of the possible health benefits of milk thistle seed related to the liver (it has numerous other benefits for other parts of the body):
*Helps to support the liver's ability to regenerate damaged tissue
*Reduces inflammation of the liver and gallbladder
*Improves digestion by stimulating bile production
*Helps to detoxify the liver from poisons like pollution and alcohol
*Provides the body with antioxidants
*Helps to treat cirrhosis of the liver, jaundice, and chronic hepatitis
Milk thistle can be taken in three different forms; capsules, tincture, and tea. There are different benefits that can be derived from taking it in each of it's three forms, so I recommend rotating how you take your milk thistle seed. Try rotating through a tincture form, then capsules, then making your own tea.
To make a milk thistle tea, crush 2 teaspoons of seed with a mortar and pestle, then pour one cup of boiling water over the seeds and allow to sit for 30 minutes before you drink. You can drink one cup a day. You can buy organic milk thistle seed at Mountain Rose Herbs by just clicking on my link to the right.

As with any herb, I do recommend taking a break and not taking it daily for extended periods of time unless you are under the guidance of a certified herbalist. I am not a licensed medical provider and the information in this post should not be construed as medical advice. If you chose to use milk thistle seed, you will be taking responsibility for your own health and wellness; the FDA has not evaluated this herb.
(Featured on the Healthy Home Economist)
Sunday, April 22, 2012
Cultured Mondays: Cultured Orange-ade; a Delicious, Probiotics Soda
It's Cultured Mondays again! I hope some of you had a chance to try my Cultured Lemonade Recipe; our family downed two gallons in just under 2 weeks and now we are having trouble keeping our hands off this Orange-ade.
Here in SoCal, I am often inundated with citrus; not a bad thing...it's just that plain old citrus juice can be boring. Well, after making this orange-ade, I don't think we will ever drink plain old citrus juice again! Even my two year old gave this a huge thumbs up!
This recipe is super easy to make and won't last long in your house:
*2 cups of fresh squeezed orange juice (you can also add in some grapefruit, tangerine, or a lemon or two if you don't have enough oranges, which is what I did)
*1 cup sucanat (unprocessed sugar) or if you don't have this, then 3/4 cup regular sugar
*1 cup of whey (or if you made my lemonade last week and have some left, you can use 1 1/2 cup of that as a starter)
*A gallon sized glass jar
*Filtered water

Add your juice, sucanat, and whey to your glass jar. Fill the remainder of the jar with filtered water, leaving 2 inches from the top, and place lid on jar. Place in a dark spot (kitchen cabinet works great) and leave out for 2-3 days, depending on the temperature. The ideal fermenting temperature is 70 degrees, so if it is a bit warmer, it will be ready sooner, and if it is cool, it may need an extra day. You will know it is ready when it tastes fizzy like soda and has lost some of it's sweetness. You can leave it out another day or two after that, but will need to feed it another cup of sucanat, as the probiotics feed on the sugar. If you want it a bit sweeter, then add a little raw honey to your cup when you drink it. Enjoy!!
(Featured on the Healthy Home Economist, Homestead Revival, Real Food Forager, Cooking Traditional Foods, GNOWFLGINS, The Nourishing Gourmet, Food Renegade)
Here in SoCal, I am often inundated with citrus; not a bad thing...it's just that plain old citrus juice can be boring. Well, after making this orange-ade, I don't think we will ever drink plain old citrus juice again! Even my two year old gave this a huge thumbs up!
This recipe is super easy to make and won't last long in your house:
*2 cups of fresh squeezed orange juice (you can also add in some grapefruit, tangerine, or a lemon or two if you don't have enough oranges, which is what I did)
*1 cup sucanat (unprocessed sugar) or if you don't have this, then 3/4 cup regular sugar
*1 cup of whey (or if you made my lemonade last week and have some left, you can use 1 1/2 cup of that as a starter)
*A gallon sized glass jar
*Filtered water

(Featured on the Healthy Home Economist, Homestead Revival, Real Food Forager, Cooking Traditional Foods, GNOWFLGINS, The Nourishing Gourmet, Food Renegade)
Thursday, April 19, 2012
Whole Foods Friday - Sourdough Biscuits
I have another delicious recipe from my sister, Christy's blog, Whole Foods's on a Budget - Sourdough Biscuits. This family loves our sourdough! These are very easy to make and a tasty treat for the weekends. So hop on over here and see just how easy these are to whip up!

Nutritional Herbology - A Book Review
I wish I found this book a lot sooner! Nutritional Herbology by Mark Pedersen is quickly becoming one of my favorite "go to" books. It can be found on amazon and in my opinion is worth every cent! Why do I like this book so much?

*It covers a large number of herbs
*Each herb's folk history, use, and medicinal properties are concisely and clearly discussed
*It has a nutritional profile *LOVE THIS* - I think this is my favorite part of the book. I love being able to see the vitamin and mineral content. This is especially helpful if you are like me and do not take a standard multivitamin, but choose herbs and other supplements instead
*This book has doses for each herb...Yay! This can be tough to find in many herbal books.
*Medicinal properties and chemical constituents are described. This is especially helpful for the herbalist.
*Traditional formulas and herbal combinations are given, along with a description of why these herbs are combined.
*The beginning of the book has a few sections describing herbal classifications and nutrients in herbs and foods, giving lists of where the best sources can be found.
I highly recommend this book for those just starting to dabble with herbs and those who have been using herbs for a long time. The information in this book is invaluable.
Disclaimer: I am an affiliate for amazon. Accessing and ordering from their site through my blog is much appreciated and helps keeps this blog going.
*It covers a large number of herbs
*Each herb's folk history, use, and medicinal properties are concisely and clearly discussed
*It has a nutritional profile *LOVE THIS* - I think this is my favorite part of the book. I love being able to see the vitamin and mineral content. This is especially helpful if you are like me and do not take a standard multivitamin, but choose herbs and other supplements instead
*This book has doses for each herb...Yay! This can be tough to find in many herbal books.
*Medicinal properties and chemical constituents are described. This is especially helpful for the herbalist.
*Traditional formulas and herbal combinations are given, along with a description of why these herbs are combined.
*The beginning of the book has a few sections describing herbal classifications and nutrients in herbs and foods, giving lists of where the best sources can be found.
I highly recommend this book for those just starting to dabble with herbs and those who have been using herbs for a long time. The information in this book is invaluable.
Disclaimer: I am an affiliate for amazon. Accessing and ordering from their site through my blog is much appreciated and helps keeps this blog going.
Tuesday, April 17, 2012
Healing Sinus and Cold Essential Oil Blend
I have had my share of the head cold, sinus headache fun over the past two weeks. Thankfully, it never turned into a sinus infection and I'm sure this essential oil blend is part of the reason I was saved from any infection.
You can make this recipe and have it ready and waiting for you to use 3-6 months in advance. It is best to start it when cold symptoms first start, as the healing process will be much faster, but if you can't, it will still help with the healing process, just not quite as quickly. It can help to prevent a current cold from developing into a sinus infection.
This is easy to make and oh, so soothing! DO NOT USE THIS IF YOU ARE PREGNANT OR BREASTFEEDING, AND THIS IS NOT INTENDED FOR CHILDREN.

*One small glass jar with dropper (You can get these HERE)
*One ounce of jojoba oil (2 Tablespoons) - I use jojoba oil because it does not tend to clog pores and will minimize any breakouts, since this is used on the face.
*10 drops of eucalyptus essential oil
*10 drops of rosemary essential oil
*5 drops of peppermint essential oil
*5 drops of thyme OR tea tree essential oil
Place the drops of essential oils into the glass jar. Put on the lid and gently roll the jar in your hands for 15 seconds to mix the essential oils together to form a synergy. Add the jojoba oil and gently roll in hands for 1 minute to thoroughly mix the oils. You can also give the jar a few gentle shakes.
Place 3-4 drops in the palm of your hand and with your fingers of the opposite hand, dip into the oil in your palm and then rub the oil on your forehead, over the bridge of your nose and across your cheekbones, and then right under your nose. Make sure you keep the oil well away from your eyes and do not allow it to get into your nose. You can do this 3 times a day. Again, if you are pregnant or nursing, do not use this product.
(Featured on Retro Mommy, Vintage Wife)
You can make this recipe and have it ready and waiting for you to use 3-6 months in advance. It is best to start it when cold symptoms first start, as the healing process will be much faster, but if you can't, it will still help with the healing process, just not quite as quickly. It can help to prevent a current cold from developing into a sinus infection.
This is easy to make and oh, so soothing! DO NOT USE THIS IF YOU ARE PREGNANT OR BREASTFEEDING, AND THIS IS NOT INTENDED FOR CHILDREN.

*One small glass jar with dropper (You can get these HERE)
*One ounce of jojoba oil (2 Tablespoons) - I use jojoba oil because it does not tend to clog pores and will minimize any breakouts, since this is used on the face.
*10 drops of eucalyptus essential oil
*10 drops of rosemary essential oil
*5 drops of peppermint essential oil
*5 drops of thyme OR tea tree essential oil
Place the drops of essential oils into the glass jar. Put on the lid and gently roll the jar in your hands for 15 seconds to mix the essential oils together to form a synergy. Add the jojoba oil and gently roll in hands for 1 minute to thoroughly mix the oils. You can also give the jar a few gentle shakes.
Place 3-4 drops in the palm of your hand and with your fingers of the opposite hand, dip into the oil in your palm and then rub the oil on your forehead, over the bridge of your nose and across your cheekbones, and then right under your nose. Make sure you keep the oil well away from your eyes and do not allow it to get into your nose. You can do this 3 times a day. Again, if you are pregnant or nursing, do not use this product.
(Featured on Retro Mommy, Vintage Wife)
Sunday, April 15, 2012
Cultured Mondays - Pickled (Lacto-fermented) Celery (Heirloom Variety Used)
It's Cultured Mondays again! How are your culturing goals coming along? We have been faithfully eating at least one cultured food a day, and I am hoping to increase to two a day soon.
My fellow blogger at the Nourished Living Network, Wardeh at GNOWFGLINS, has written an amazing book with about 150 fermenting recipes. Yup, 150! I'm learning that almost everything can be fermented. You can find her book, The Complete Idiot's Guide to Fermenting Foods, HERE. I highly recommend this book for anyone who wants to learn how to ferment foods.
Another fellow blogger, founder of the Nourished Living Network, KerryAnn, just had a wonderful post about fermenting the proper way, on her blog, Cooking Traditional Foods. I learned so much from this post. Here is the link if you are interested. After reading this, I plan on placing my ferments in my Harsch Crock and I just bought two pickl-it jars to try, so I will update you on how I like using these. I'm learning that while mason jars will give you some probiotics, they will not give you the best. So, while I may use mason jars here and there, I will be converting over entirely to anerobic fermenting containers in the coming month.
Now, onto the celery! I was perusing the farmer's market on Saturday, looking for something fun to culture this weekend. It's spring and chilly, and mostly greens, beets, and carrots abound this time of year. But then these beautiful red stalks caught my eye and I was thrilled to have stumbled upon some organic heirloom celery. I have never seen this red celery before, but here it is! And the taste . . . imagine the normal celery taste but ten times stronger. This celery is delicious, and I think its the way God intended celery to taste.

This recipe is very easy. Here is what you need:
* One 6 cup or two quart sized glass canning jars
* Four stalks, plus a few pieces of the heart cut into 3-4 inch sticks; can include a few leaves if you like
* One small head of garlic
* Two sprigs of rosemary and a few sage leaves or fresh herbs of choice; or none at all
* Four tablespoons of pink or sea salt
* Two tablespoons of whey
* Around 5 cups of filtered water

Wash your celery, garlic (skins off), and herbs thoroughly, cutting off any damaged or brown pieces. Cut your celery into 3-4 inch stick sized pieces. Take each piece of garlic and cut in half any large pieces, then lightly crush each clove. Add all your vegetables and herbs to your jar along with your salt and whey. Then add your filtered water.

Give the jar a few shakes to help distribute the salt and whey throughout the water. Set in a dry, dark place (a kitchen cabinet is fine) and allow to sit for about a week (if very warm, then check after 4-5 days, but if cooler, then it will probably need a week, as the ideal fermenting temperature is around 70 degrees). Once your celery is done fermenting, move to the refrigerator.
(Featured on Healthy Home Economist, Homestead Revival, Real Food Forager, Cooking Traditional Foods, The Nourishing Gourmet, GNOWFLGINS, Food Renegade, Real Food Freaks)

 |
| Yup, this is celery! An organic, heirloom version. |
Another fellow blogger, founder of the Nourished Living Network, KerryAnn, just had a wonderful post about fermenting the proper way, on her blog, Cooking Traditional Foods. I learned so much from this post. Here is the link if you are interested. After reading this, I plan on placing my ferments in my Harsch Crock and I just bought two pickl-it jars to try, so I will update you on how I like using these. I'm learning that while mason jars will give you some probiotics, they will not give you the best. So, while I may use mason jars here and there, I will be converting over entirely to anerobic fermenting containers in the coming month.
Now, onto the celery! I was perusing the farmer's market on Saturday, looking for something fun to culture this weekend. It's spring and chilly, and mostly greens, beets, and carrots abound this time of year. But then these beautiful red stalks caught my eye and I was thrilled to have stumbled upon some organic heirloom celery. I have never seen this red celery before, but here it is! And the taste . . . imagine the normal celery taste but ten times stronger. This celery is delicious, and I think its the way God intended celery to taste.

This recipe is very easy. Here is what you need:
* One 6 cup or two quart sized glass canning jars
* Four stalks, plus a few pieces of the heart cut into 3-4 inch sticks; can include a few leaves if you like
* One small head of garlic
* Two sprigs of rosemary and a few sage leaves or fresh herbs of choice; or none at all
* Four tablespoons of pink or sea salt
* Two tablespoons of whey
* Around 5 cups of filtered water

Wash your celery, garlic (skins off), and herbs thoroughly, cutting off any damaged or brown pieces. Cut your celery into 3-4 inch stick sized pieces. Take each piece of garlic and cut in half any large pieces, then lightly crush each clove. Add all your vegetables and herbs to your jar along with your salt and whey. Then add your filtered water.

Give the jar a few shakes to help distribute the salt and whey throughout the water. Set in a dry, dark place (a kitchen cabinet is fine) and allow to sit for about a week (if very warm, then check after 4-5 days, but if cooler, then it will probably need a week, as the ideal fermenting temperature is around 70 degrees). Once your celery is done fermenting, move to the refrigerator.
(Featured on Healthy Home Economist, Homestead Revival, Real Food Forager, Cooking Traditional Foods, The Nourishing Gourmet, GNOWFLGINS, Food Renegade, Real Food Freaks)

Subscribe to:
Posts (Atom)